Connecting Data Sources.
Explanation of the functionalities of connecting external sources.
With DataKubes, you can connect your database to our platform to have your data available for any project you desire. In this documentation, we will explain how to achieve this.
Connecting DataKubes with External Data Sources
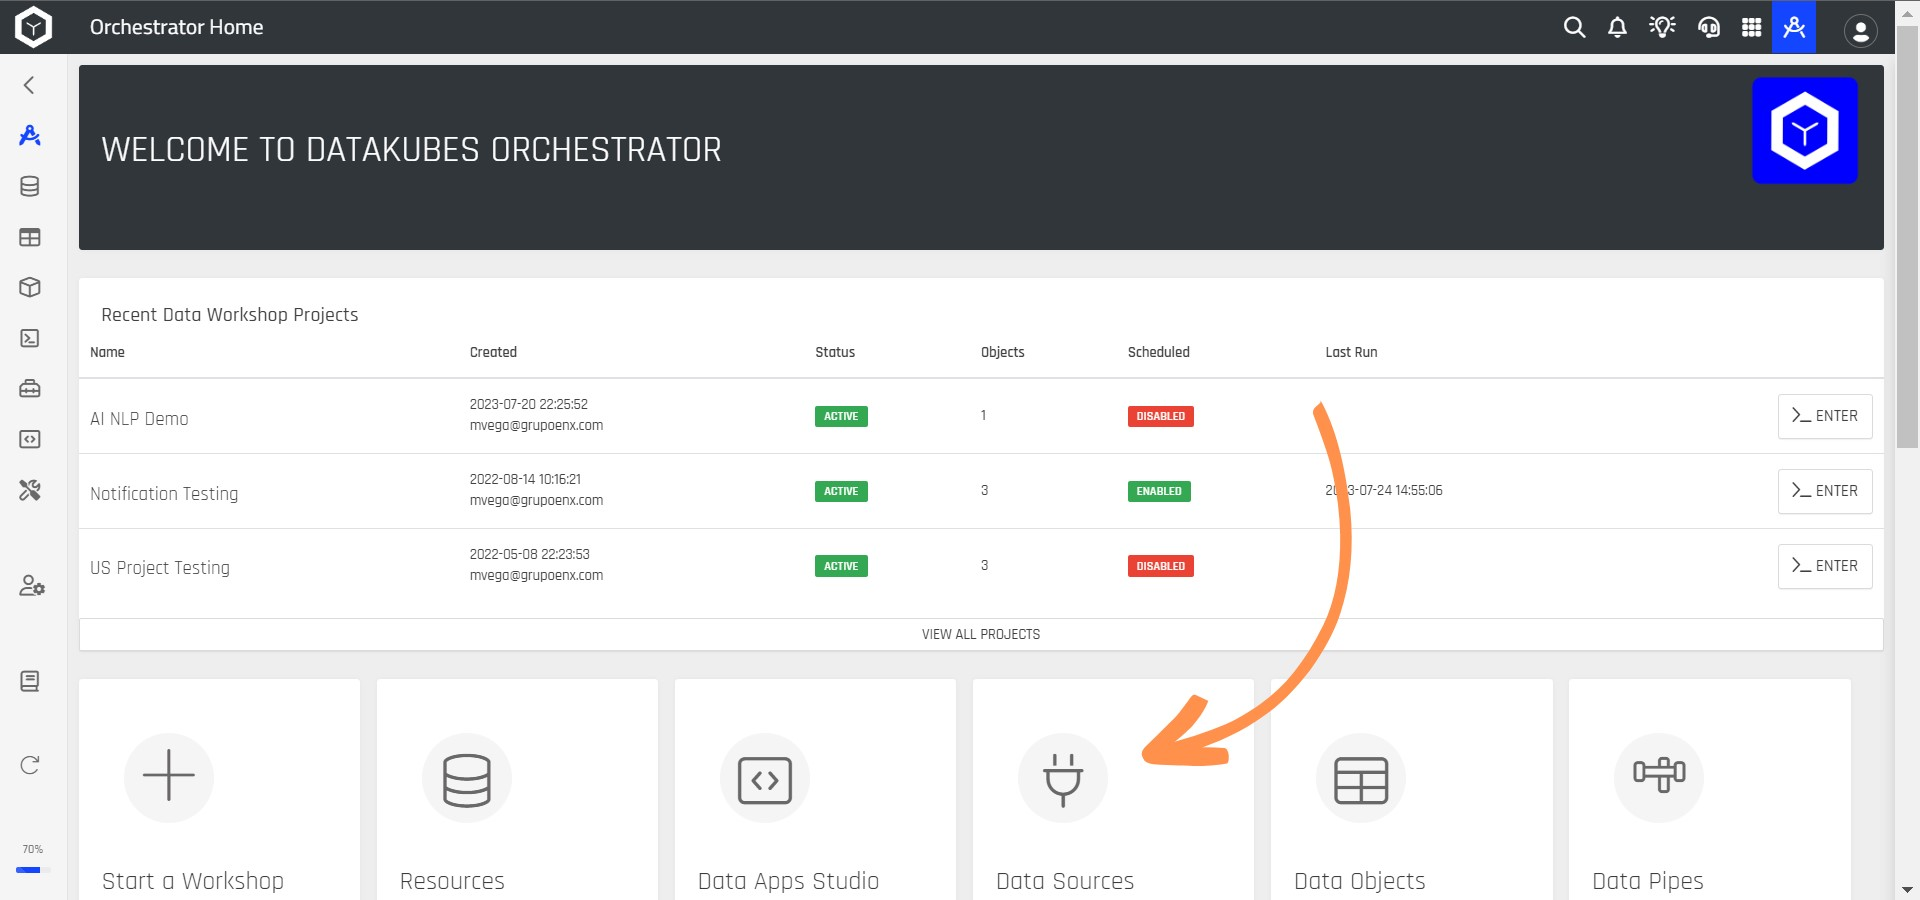
Step 1: On the main Orchestrator screen, select the Data Sources tool.
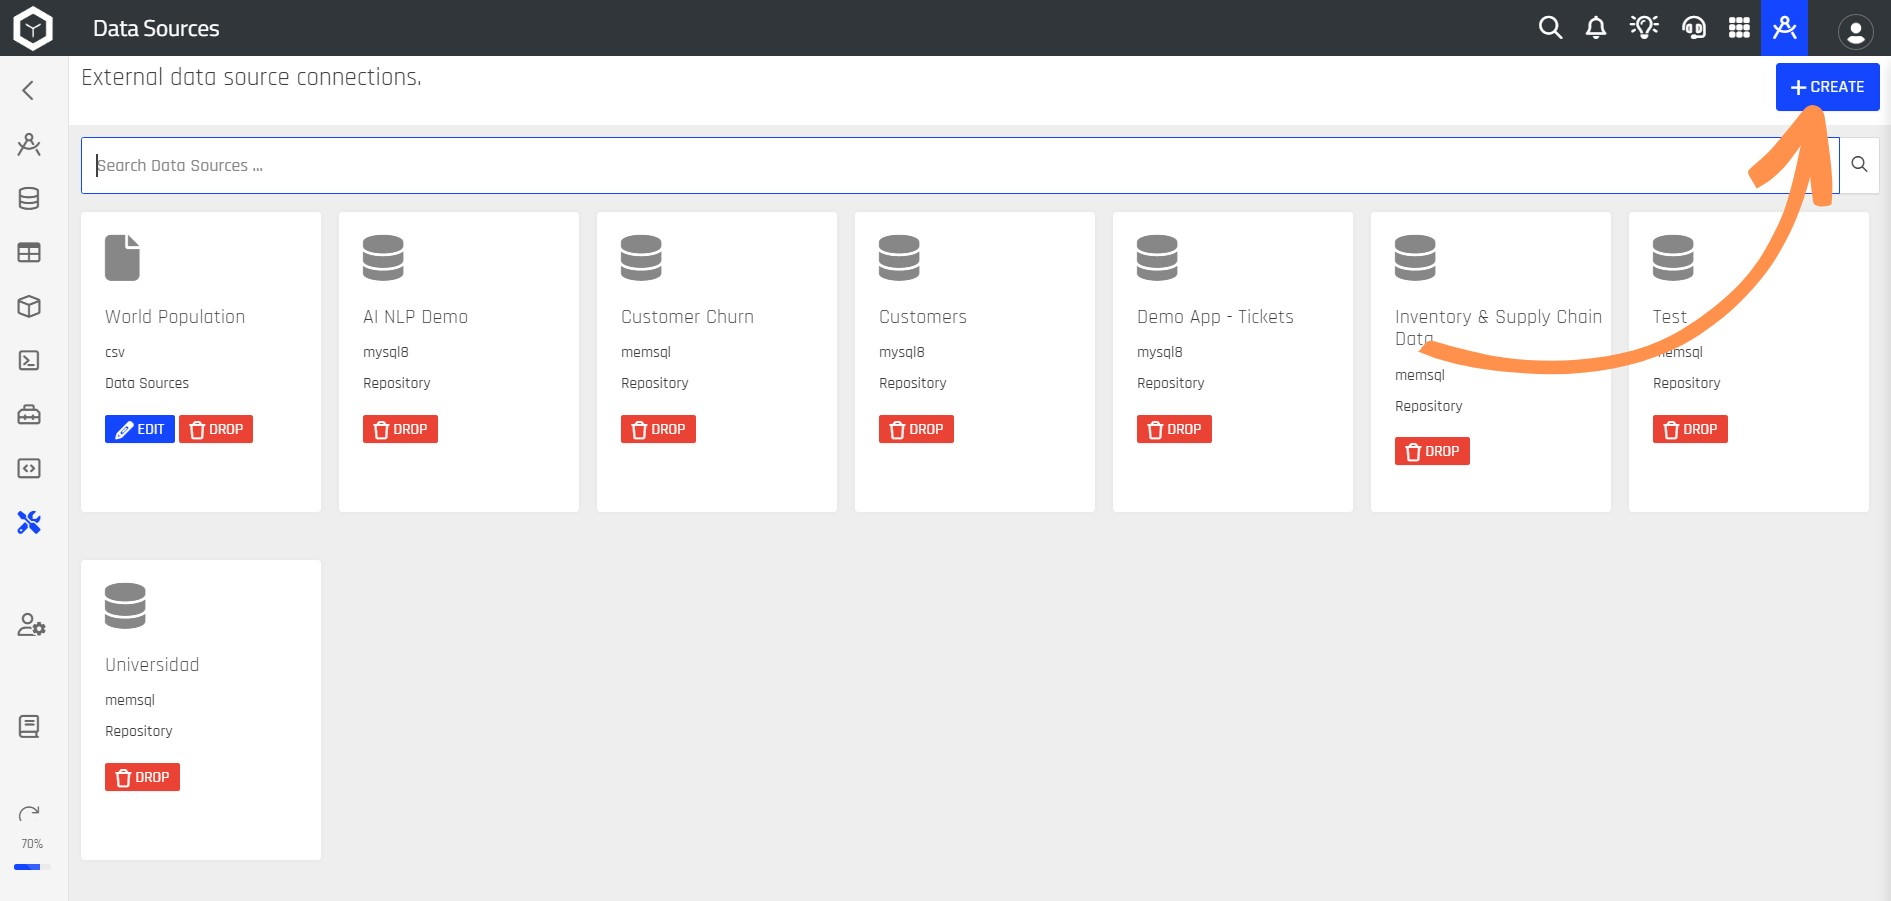
Step 2: After selecting Data Sources, a new screen will open where you can view existing connections. To create a new connection, click on the + CREATE+ button.
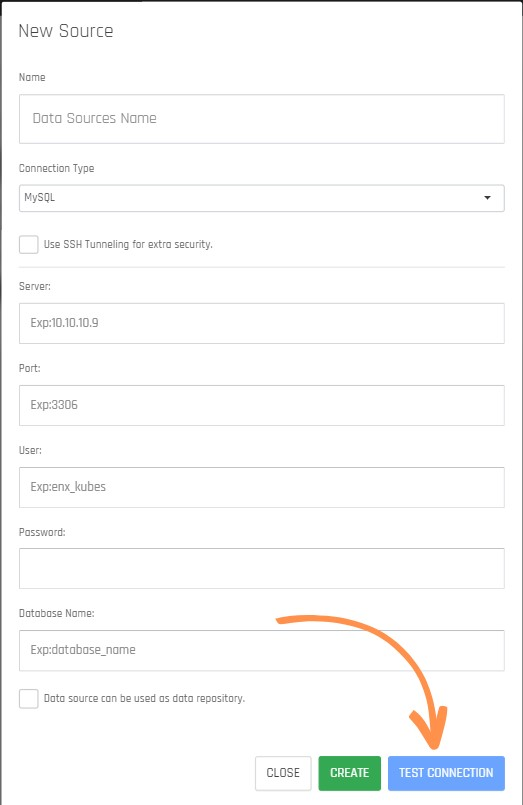
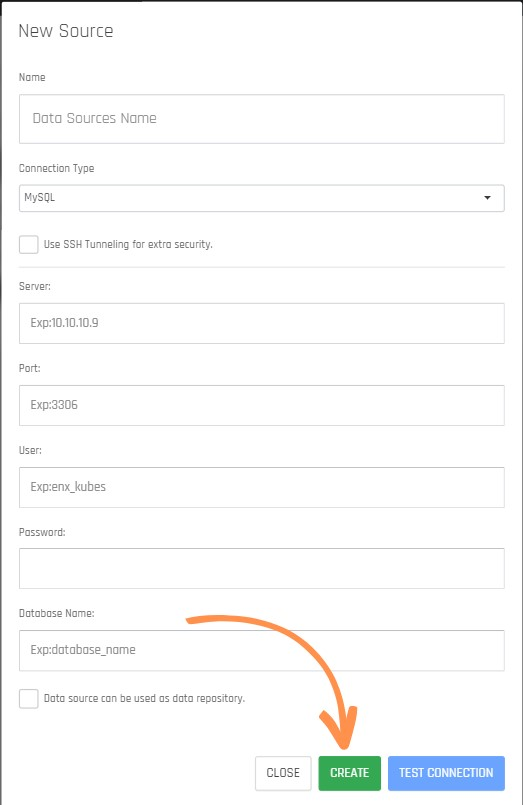
Step 3: A new screen will appear, where you need to enter the details of your database. Define the connection name, connection type, and the necessary database information based on the properties available in your plan.
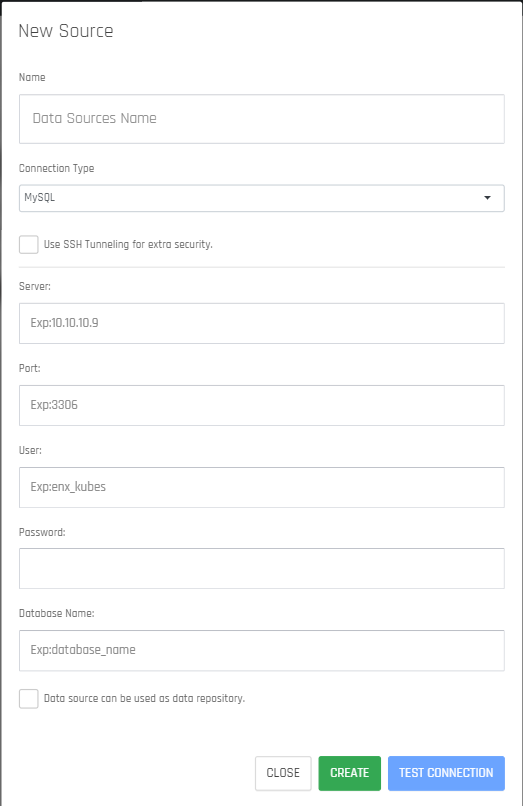
NOTEDataKubes allows you to connect external sources for analysis cubes or data extraction. Currently, the databases compatible with DataKubes are:
Database Kubes Design (Live) DataPipes Extraction MySQL Yes Yes PostgreSQL No Yes Amazon RDS (MySQL / PostgreSQL / Redshift) Partial Yes SingleStore Yes Yes MSSQL (Microsoft) No Yes CSV, TAB, JSON (Direct URL Pull) No Yes ODBC No Yes If your database is not listed here, you can use integration services like FiveTran, Hevo, or similar, which allow you to create pipelines from any source to DataKubes.
Enterprise PlanPlease note that to use external data pipeline services, you need to have the Enterprise plan. These services require external credentials to send data to the repositories in your private cloud.
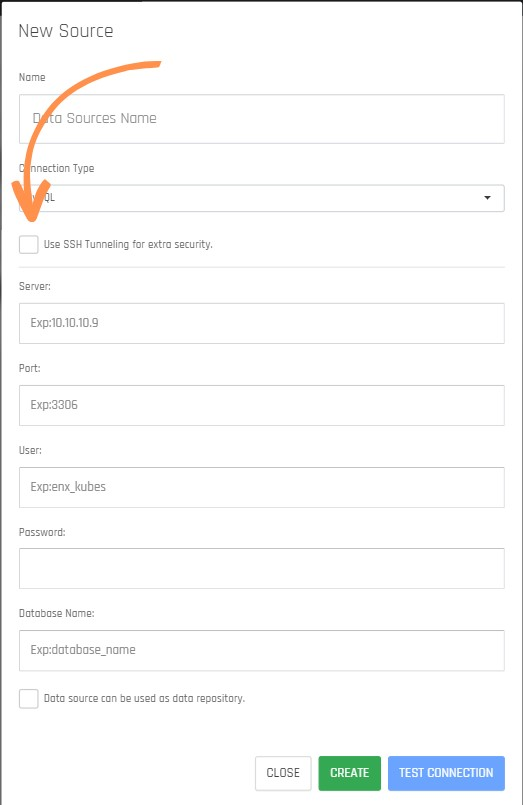
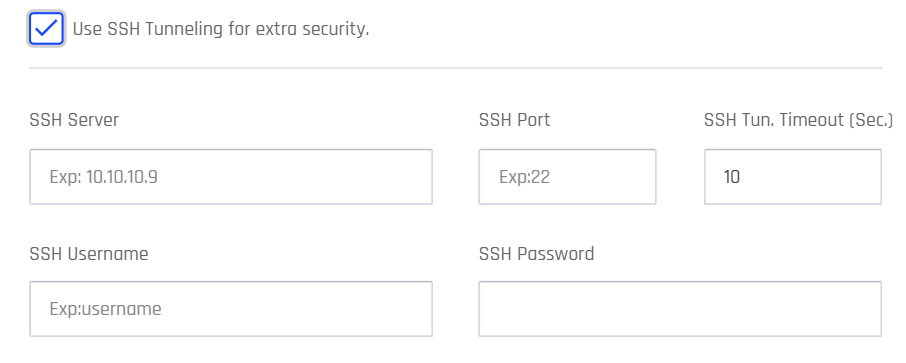
Step 4: In DataKubes, you can use data encryption through SSH tunnels for a secure connection. Simply check the option Use SSH Tunneling for extra security.
Step 5: After choosing the option Use SSH Tunneling for extra security, an additional tab will open, where you need to fill in the corresponding information.
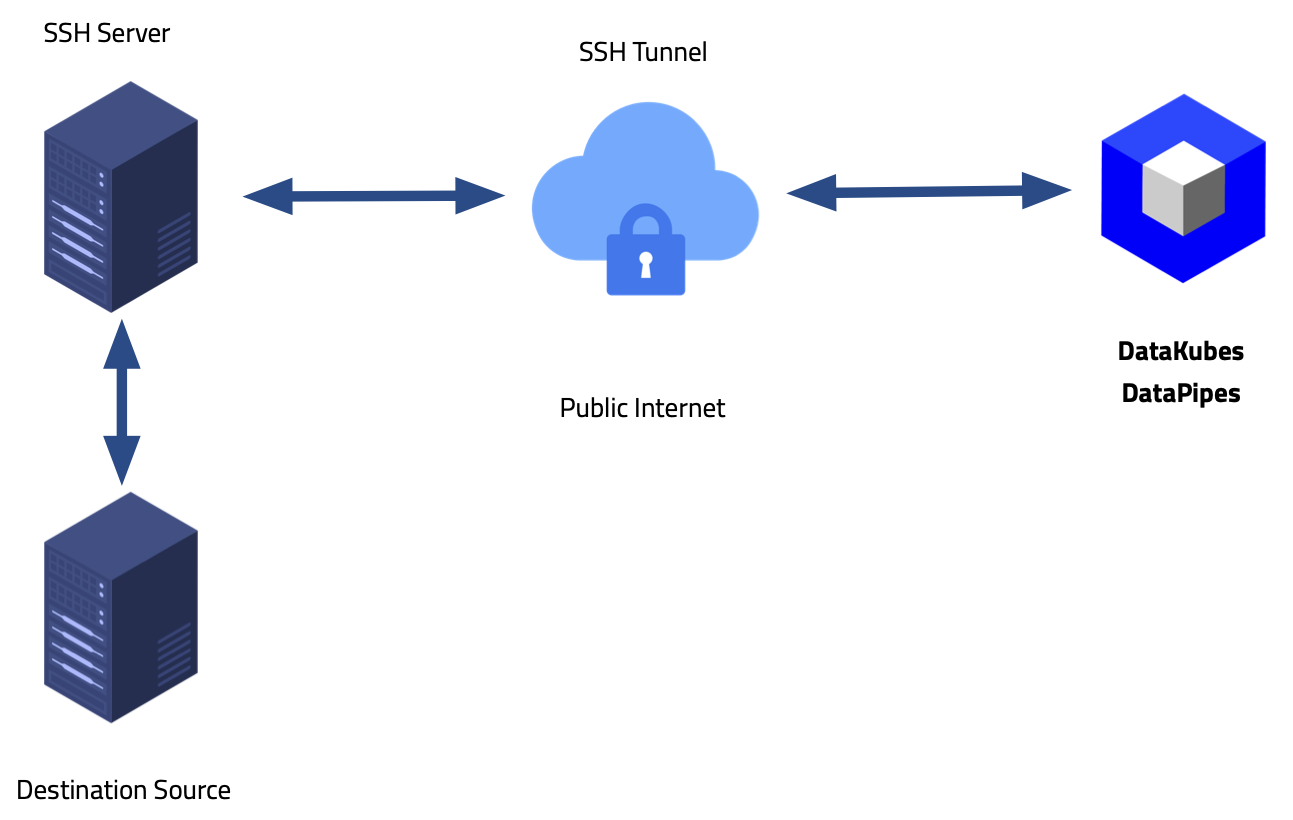
For proper use of SSH's power and to protect your data as it travels from the source to DataKubes repositories, it's important to set up the SSH tunnel design as shown in the following image:
Step 6: Once you have configured your connection, you can test it by clicking on TEST CONNECTION.
Step 7: After testing the connection successfully, simply click the CREATE button.
Step 8: Once your connection is created, you can see it listed in the Data Sources section.
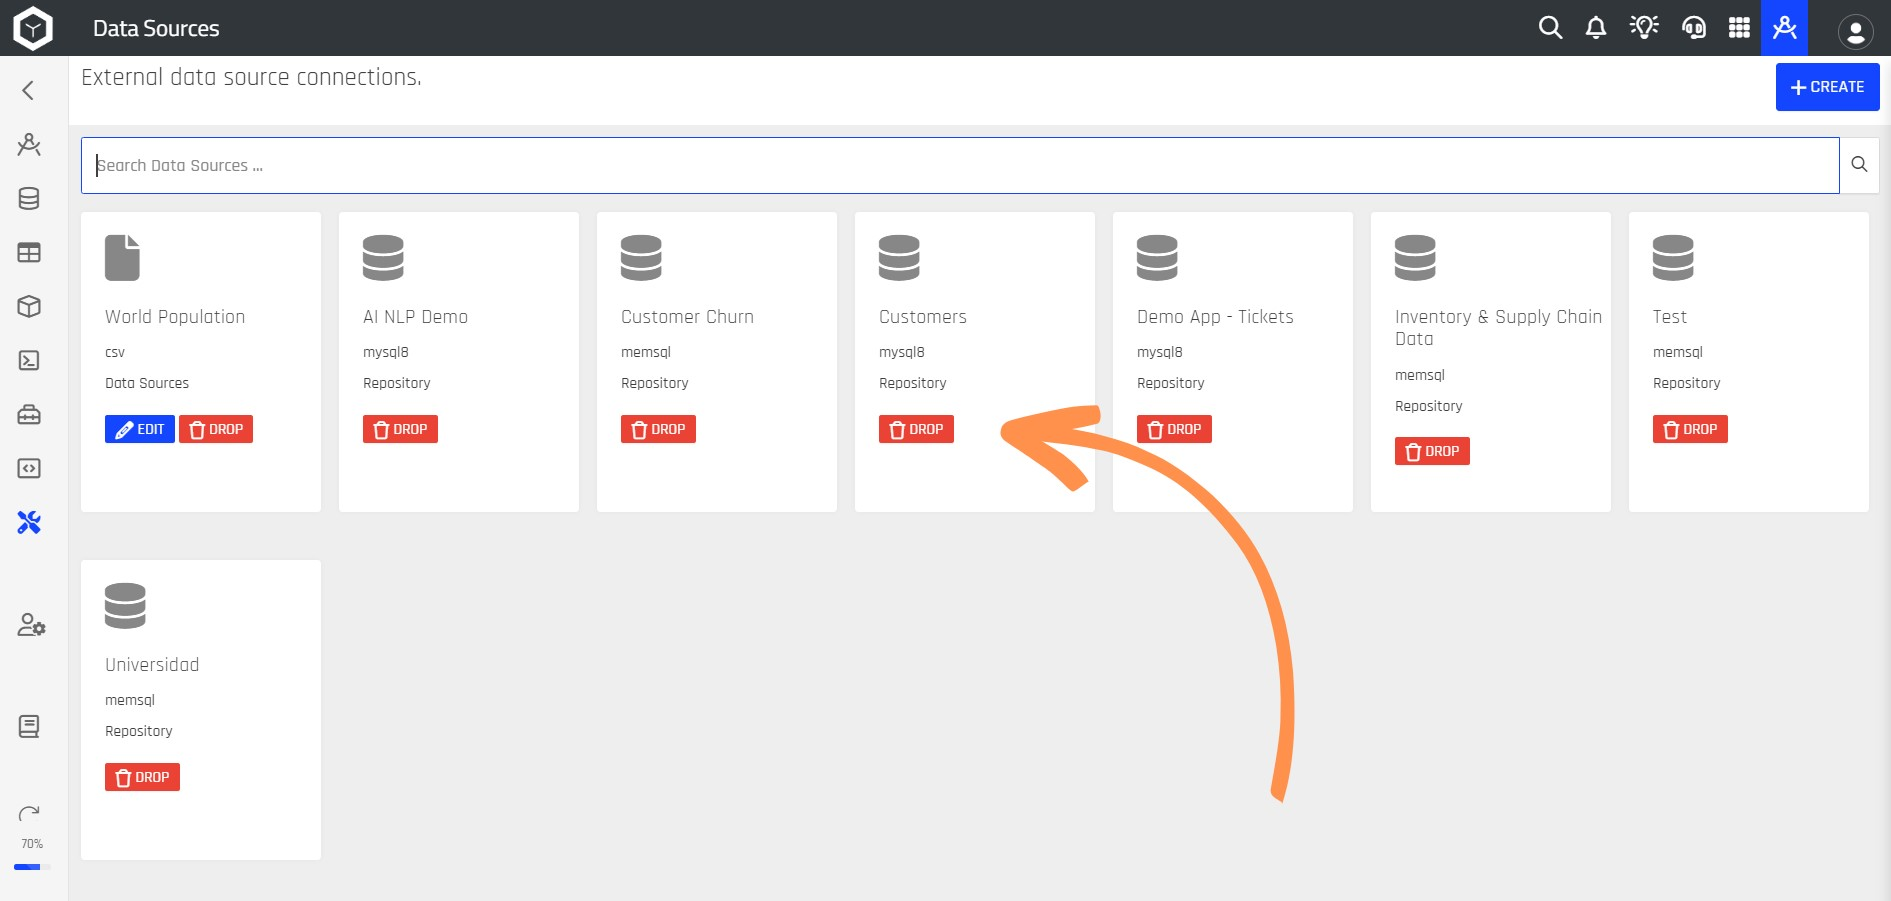
Once the data source is configured, you can use it according to its type, whether to create cubes in Kubes Designer or Data Pipes to extract data from this source to the repositories configured in your account.
Updated over 1 year ago