Users Access Configuration
How Does It Help?
Just like in any business, the team can become quite large. As a result, there are situations where not all team members need access to the entire DataKubes project. In this documentation, you'll learn how to grant users access to different parts of the project.
Access to DataApps and Individual Screens by User
In this section, you'll learn how to provide users with access to DataApps and their individual screens.
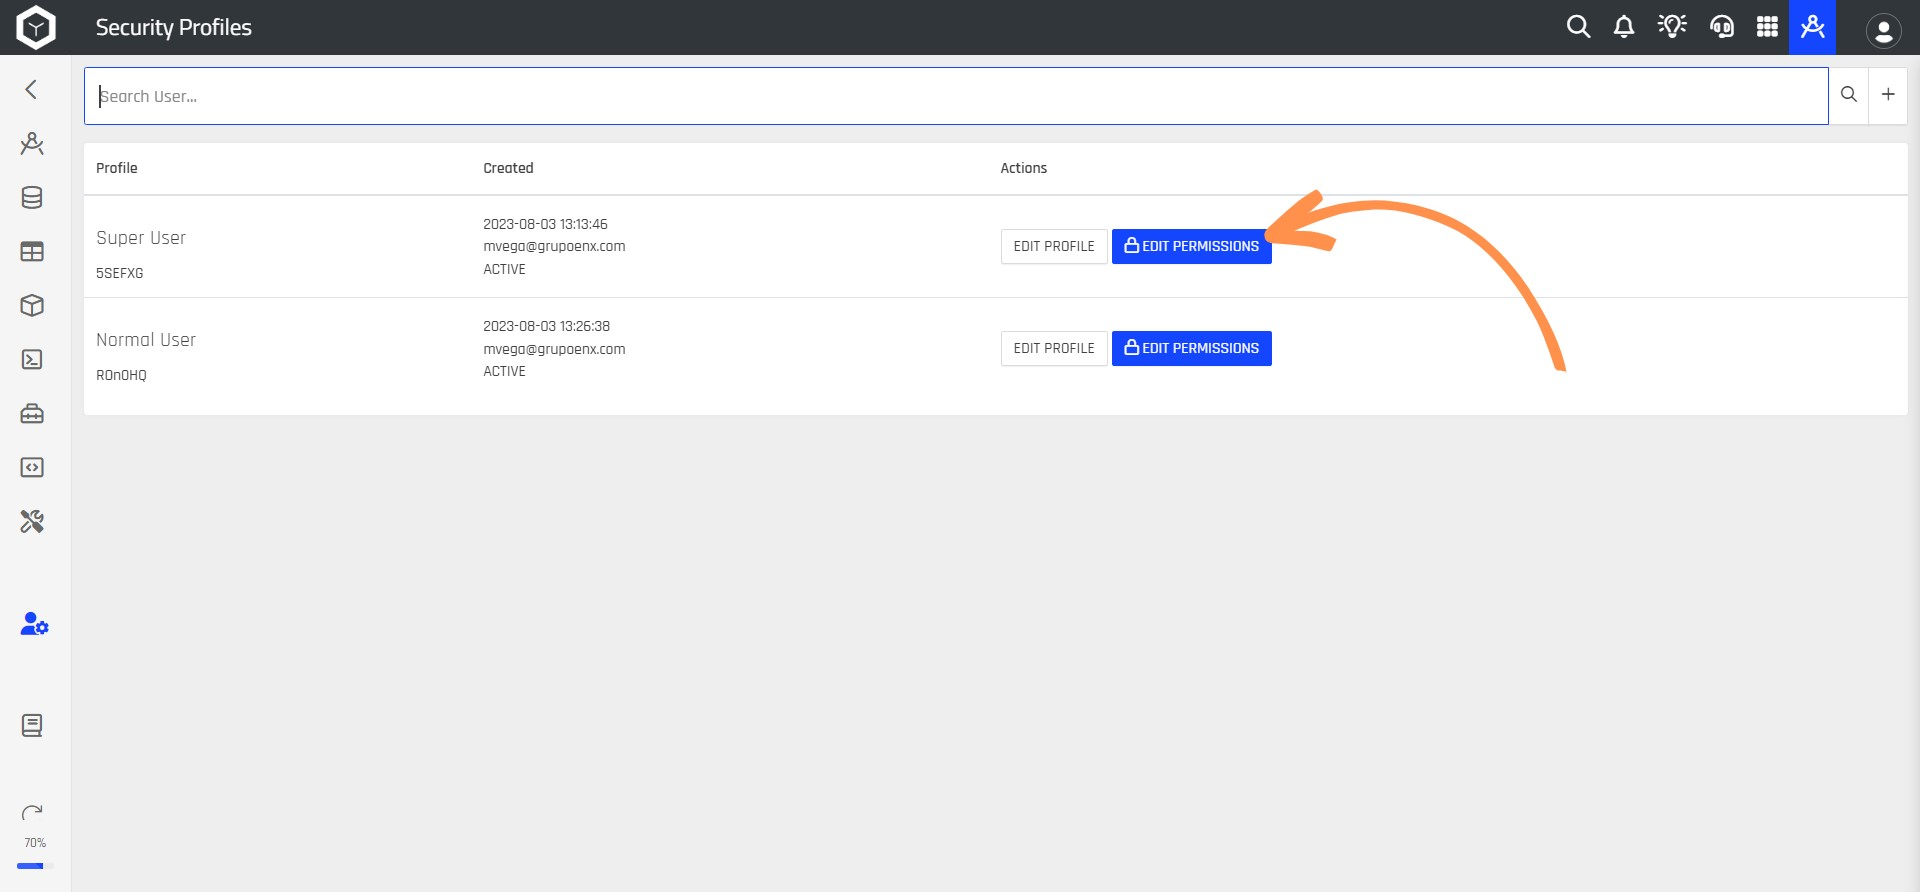
Step 1: In the Orchestrator's Home section, navigate to the Security Settings.
Step 2: Next, create a Security Profile by clicking the + button to add a new profile. Provide a name for the security profile and click the SAVE button.
Assigning a ProfileTo assign a profile to a user, refer to the documentation on Security.
Step 3: Click the EDIT PERMISSIONS button.
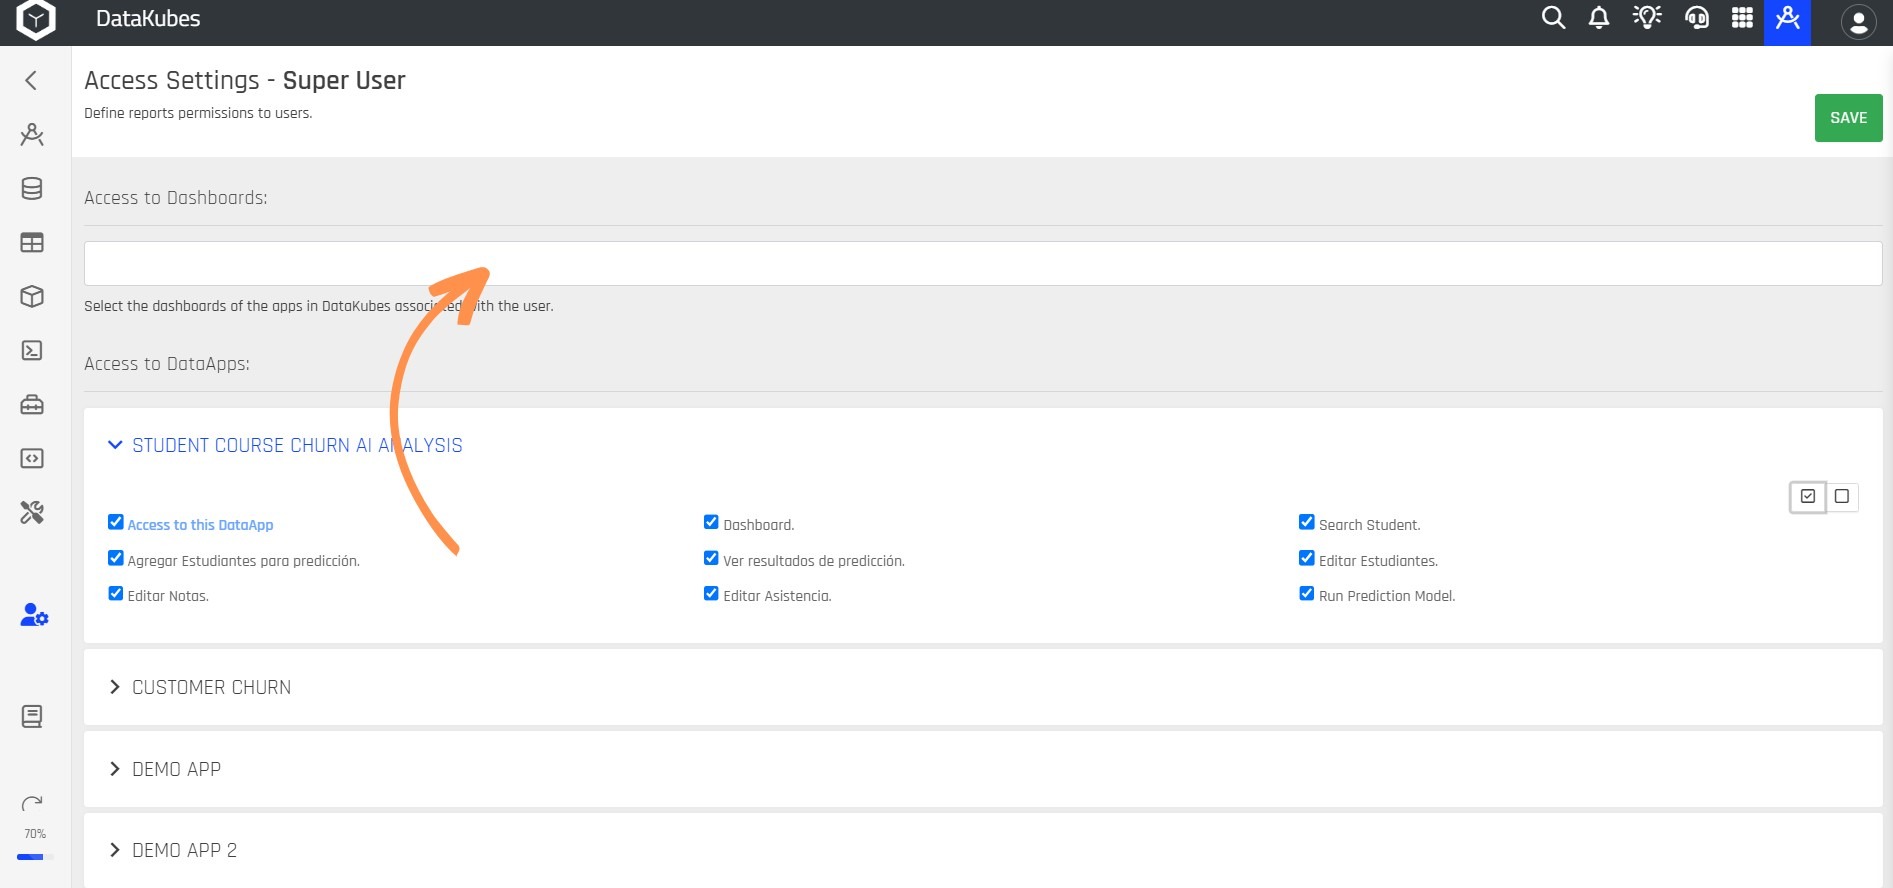
Step 4: Then, choose the permissions for the security profile in the Administrative Settings section.
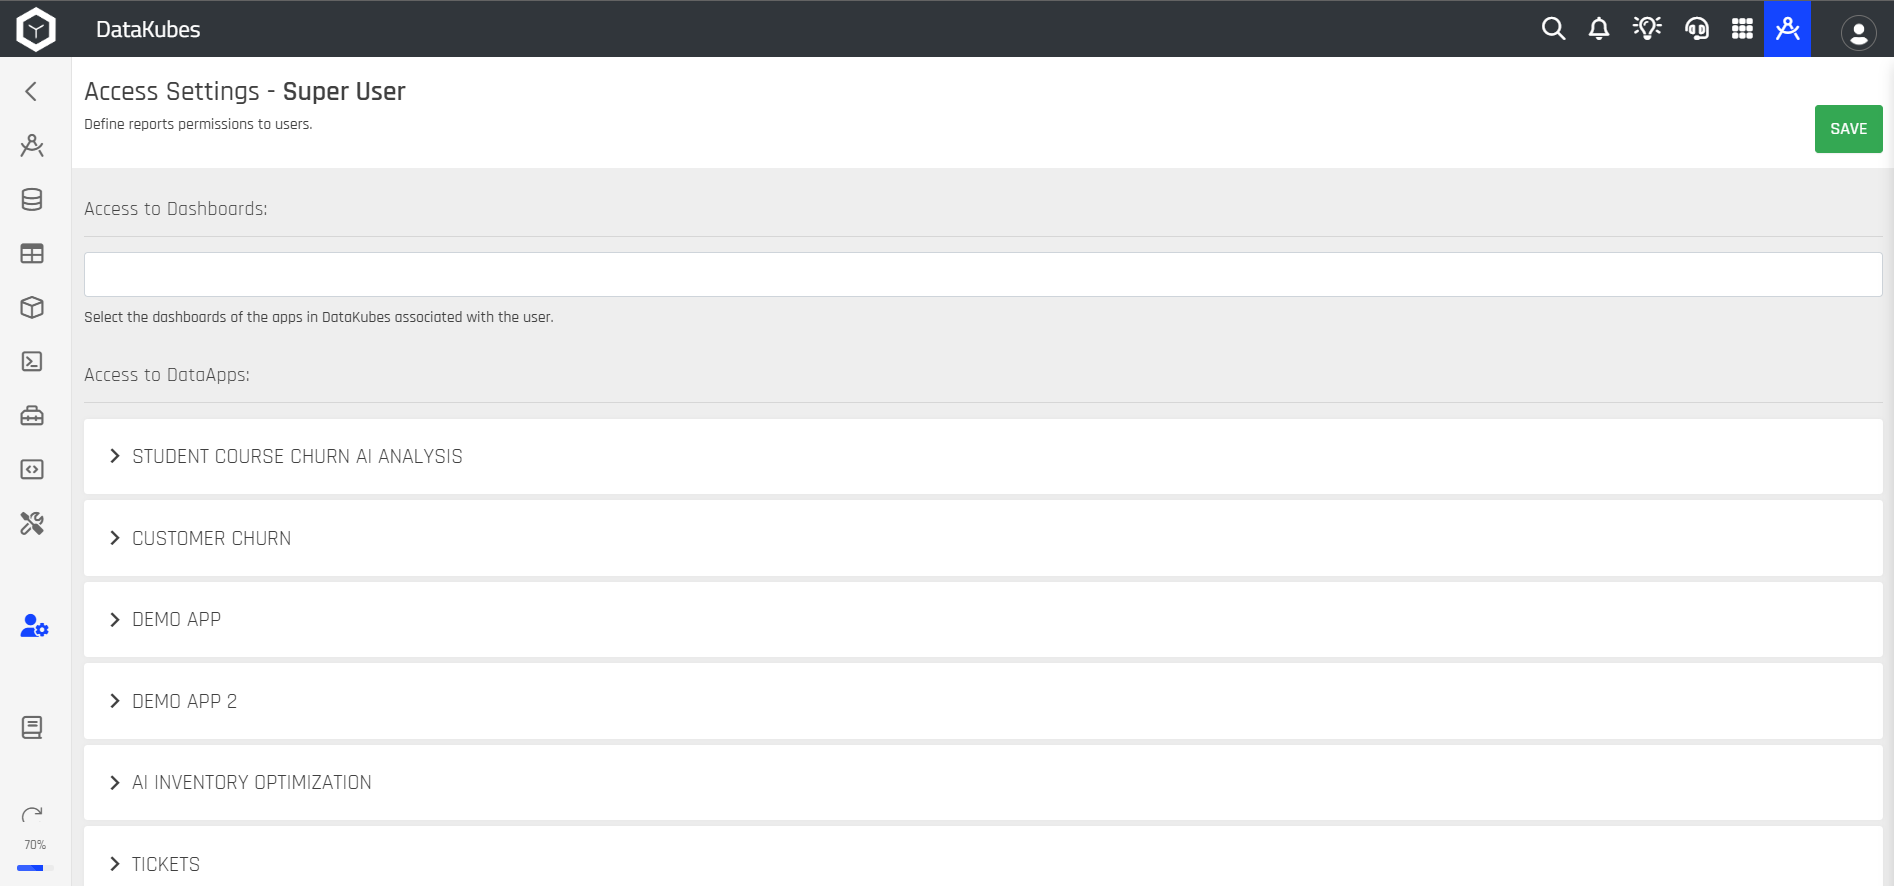
Step 5: In the Access to DataApps section, select the DataApp and then choose the screens you want to grant the user access to.
Step 6: You can also click the button to select all screens to expedite the process.

User Access to Dashboards
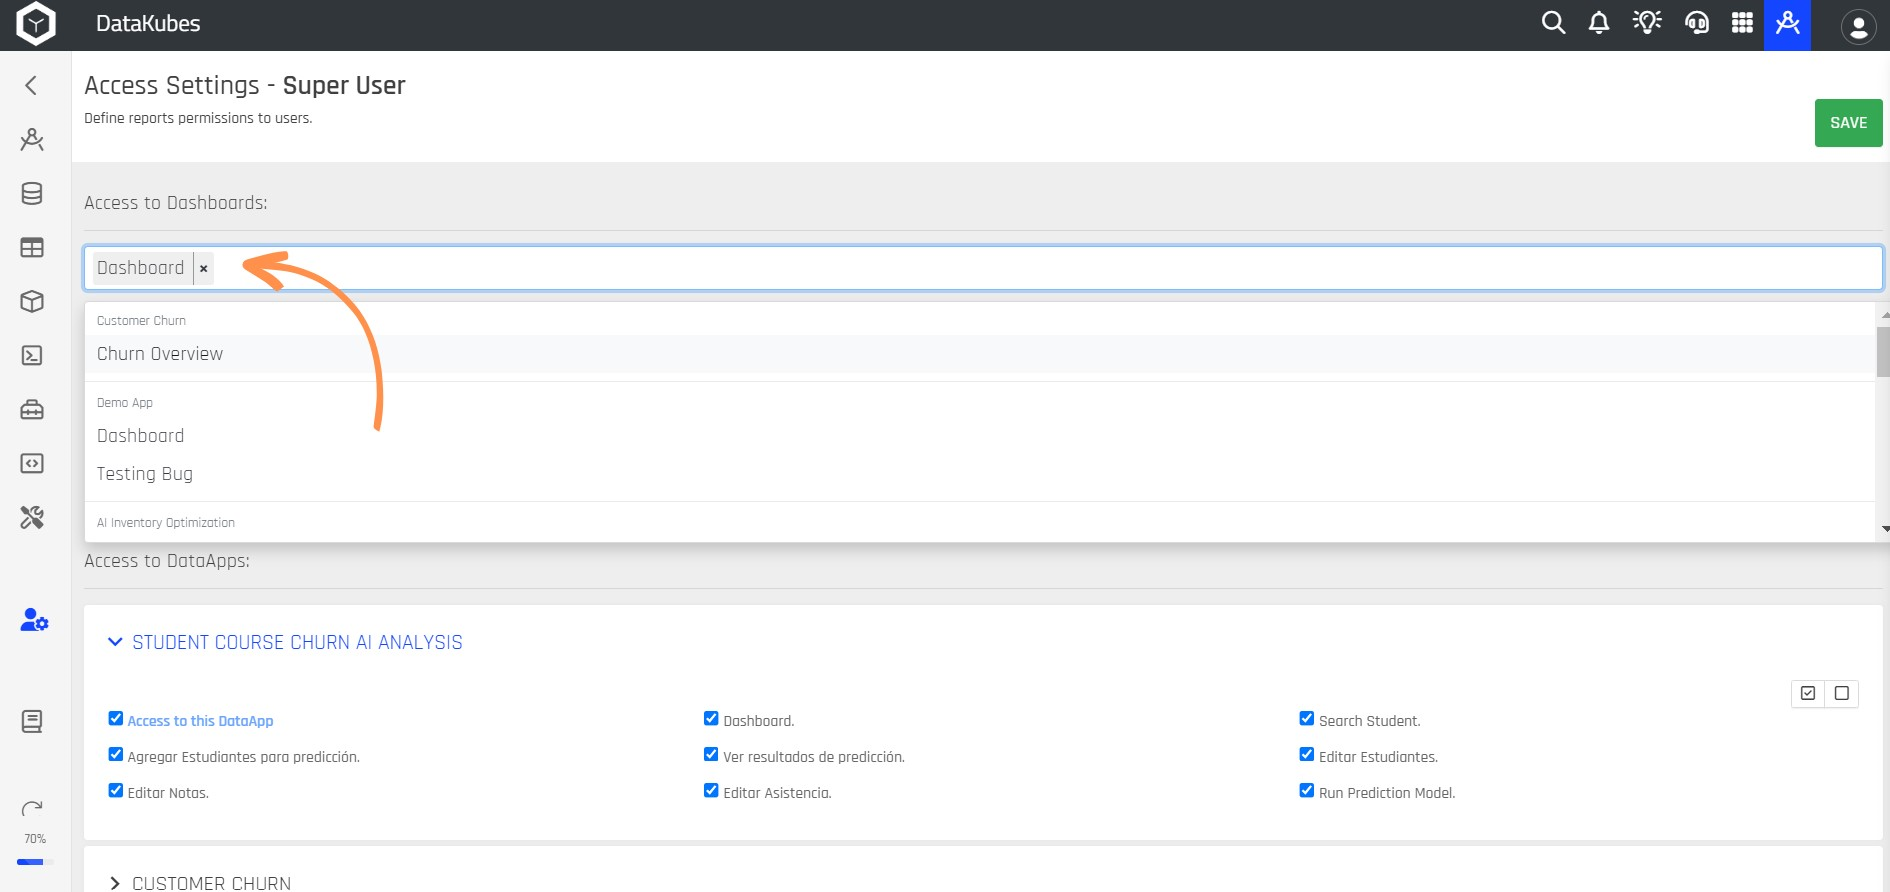
Step 1: Perform steps 1 and 2 from the previous section to access the Access Settings screen for the selected user.

Step 3: Go to the search bar and click on Access to Dashboards.
Step 4: Select the Dashboards to which you want to grant access for the user, then click SAVE.
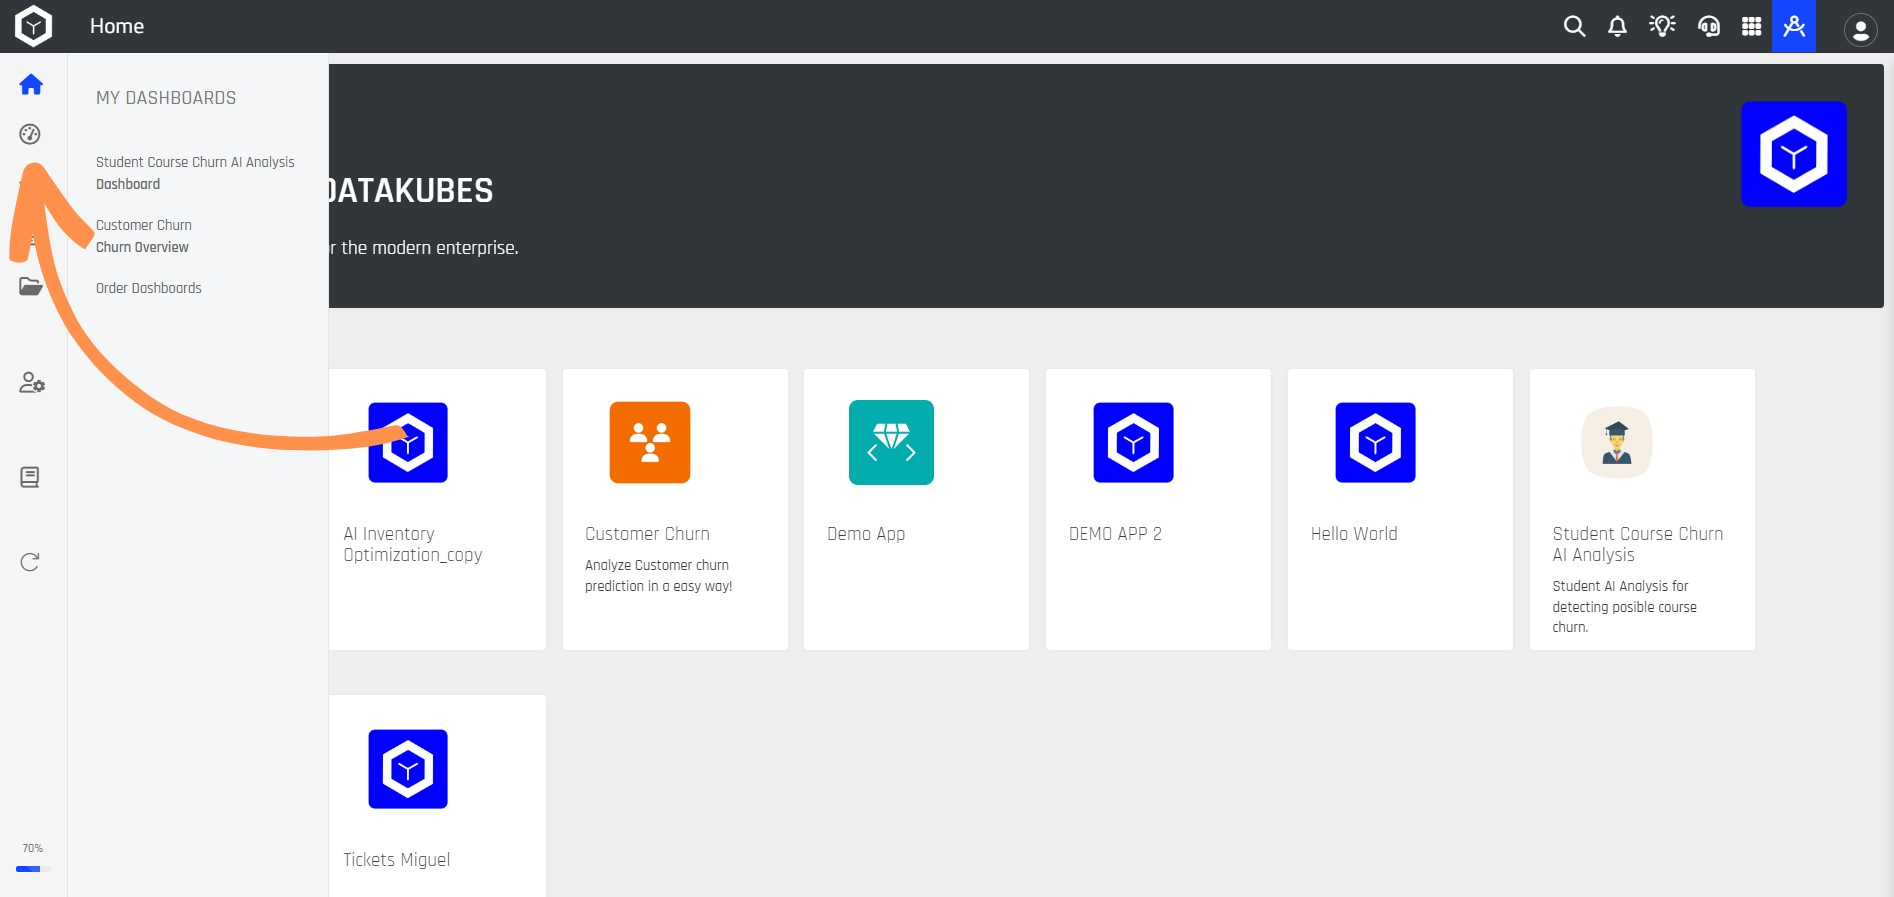
Step 5: Go to the Home page and select the My Dashboards option to see the dashboards to which access has been granted.
User Access to Kubes (Cubes in DataKubes)
Step 1: Perform steps 1 and 2 from the previous section to access the Access Settings screen for the selected user.
Step 2: Then, go to Access to Kubes, select the Kubes to which you want to grant access, and click the SAVE button.
This way, you can manage access permissions for project members in your team.
Updated over 1 year ago