DataForm
What is a DataForm?
This tool is useful for creating forms designed for data collection in the field or online in a simple and effective manner. Each form is mapped to a repository table.
How to Create a DataForm
To create a DataForm, follow these steps:
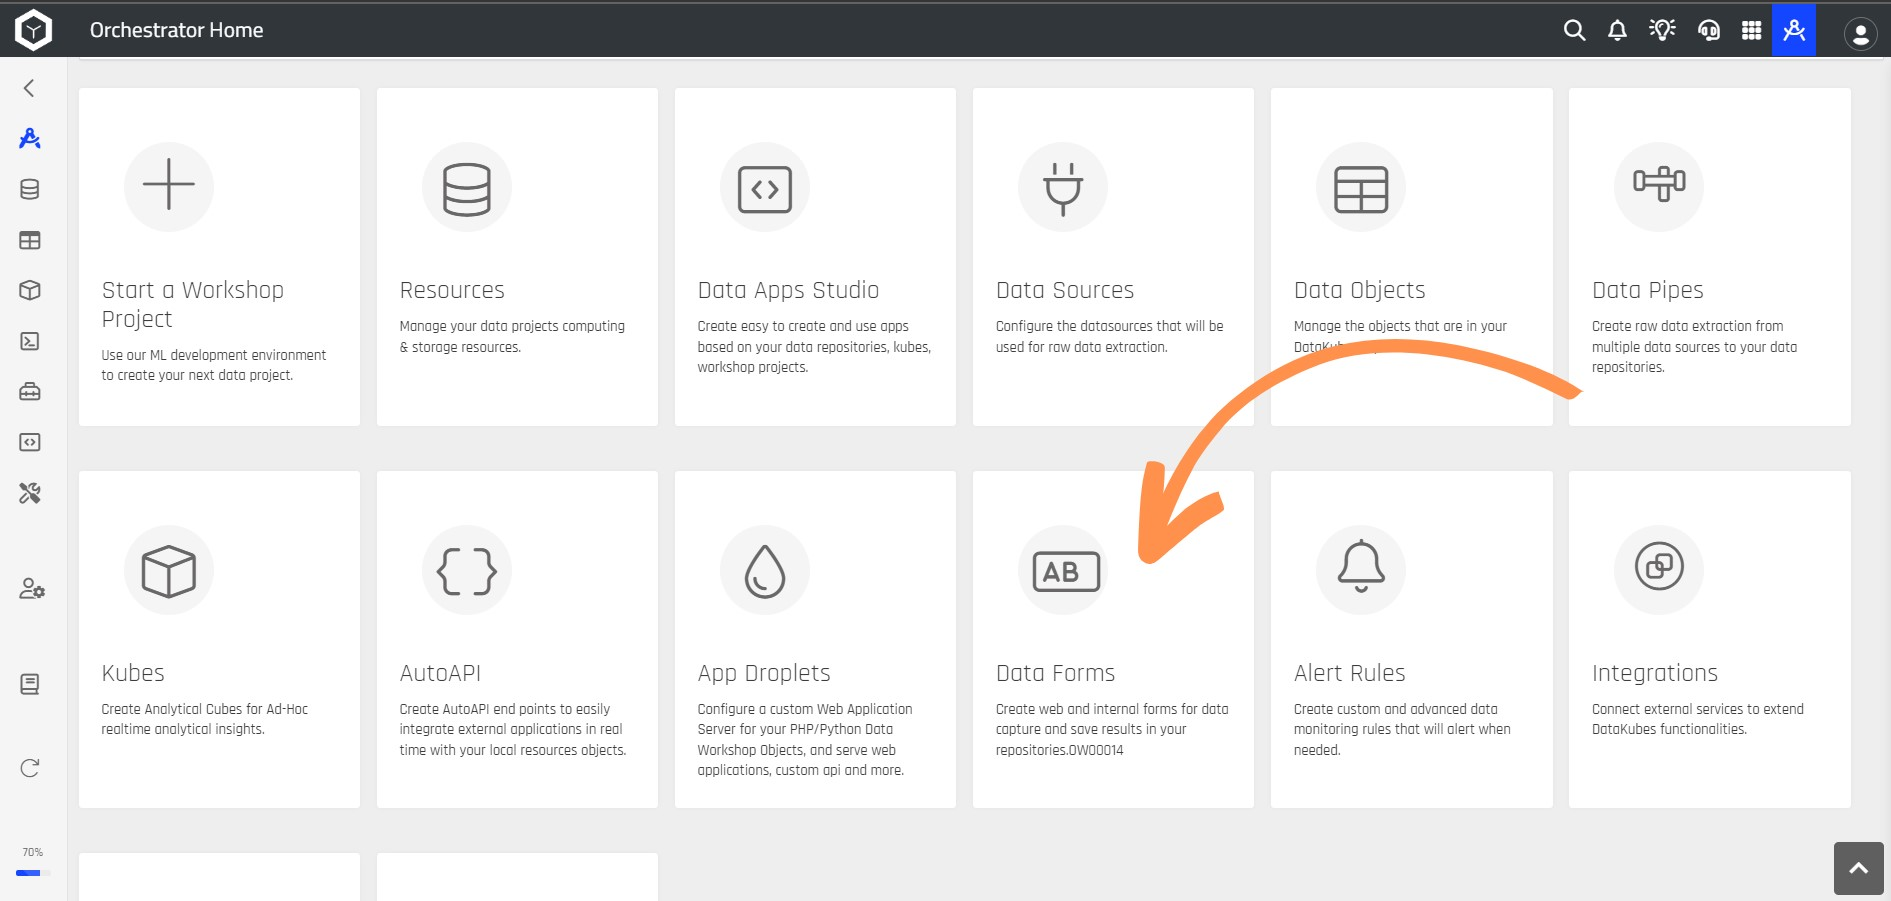
Step 1 From your Orchestrator's Home screen, select the Data Forms option.
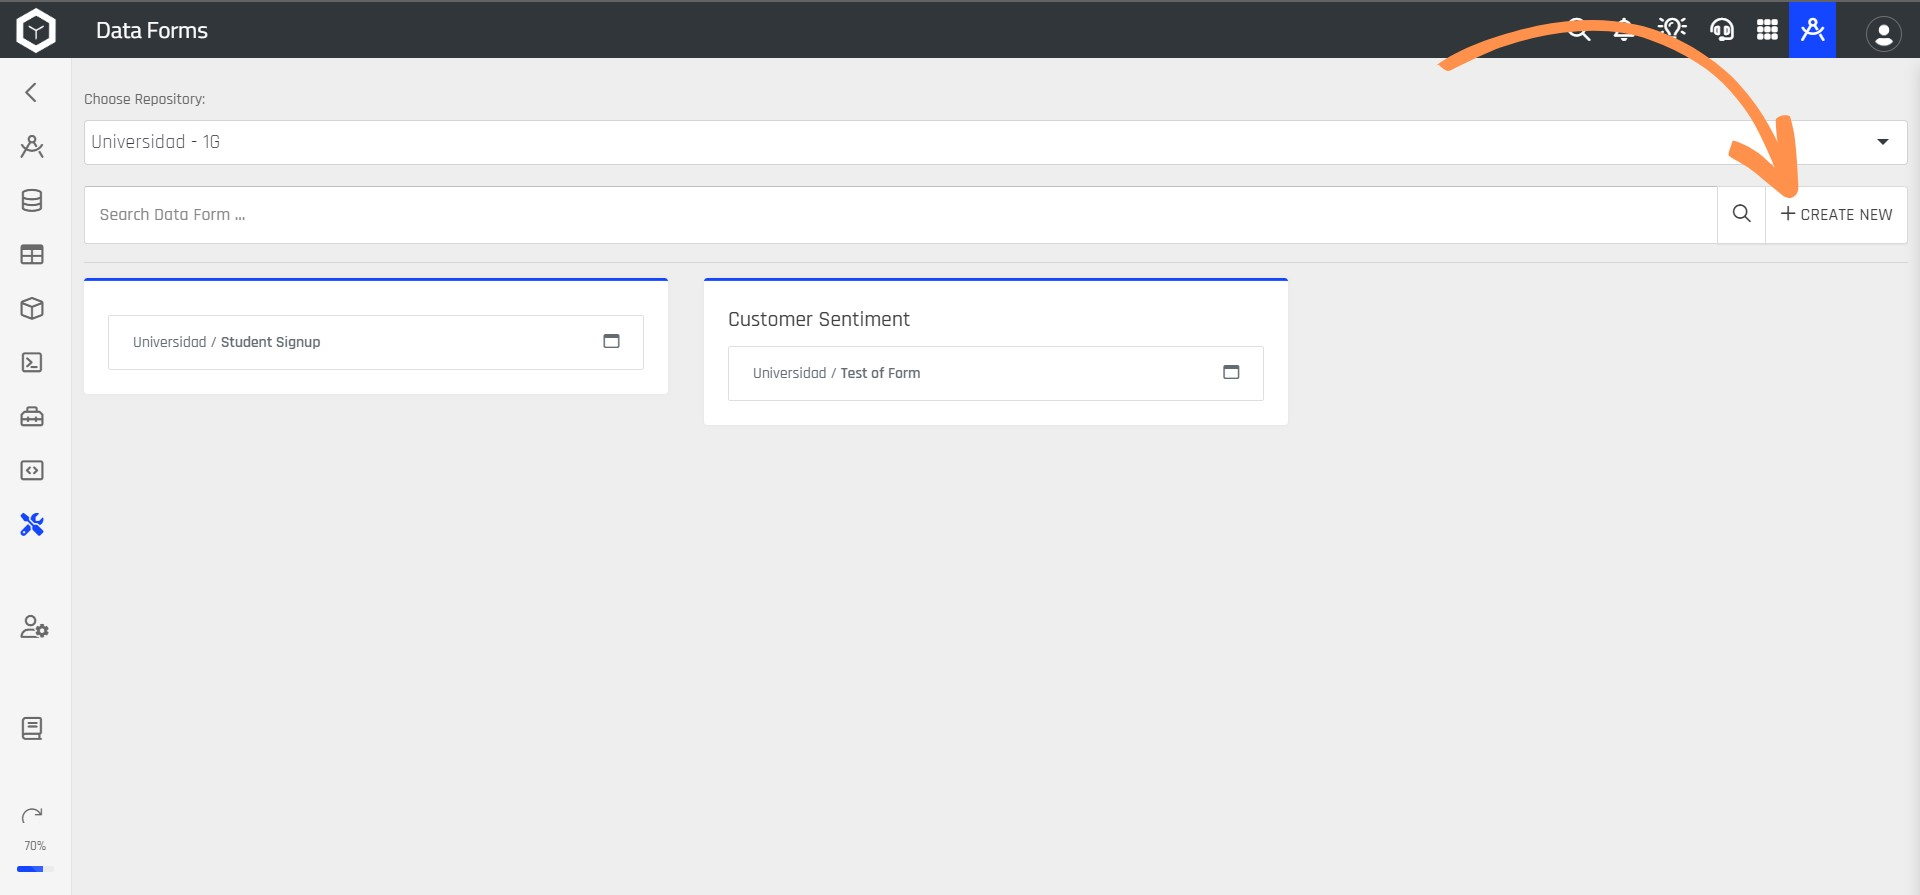
Step 2 Click the + CREATE NEW button.
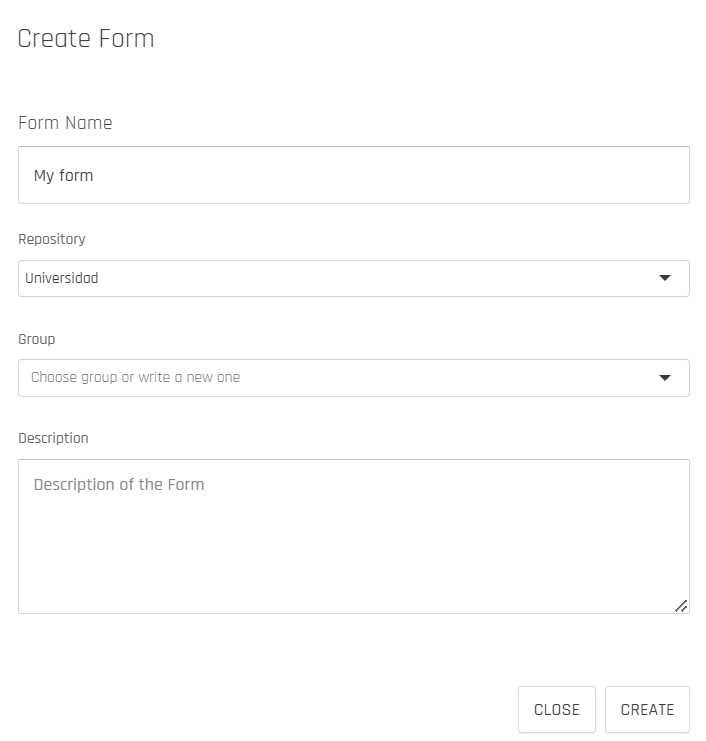
Step 3 A new window will open where you need to pre-configure your form with the form name, the repository where the data will be stored, the group to which the form will belong, and an optional description. Then, click the CREATE button.
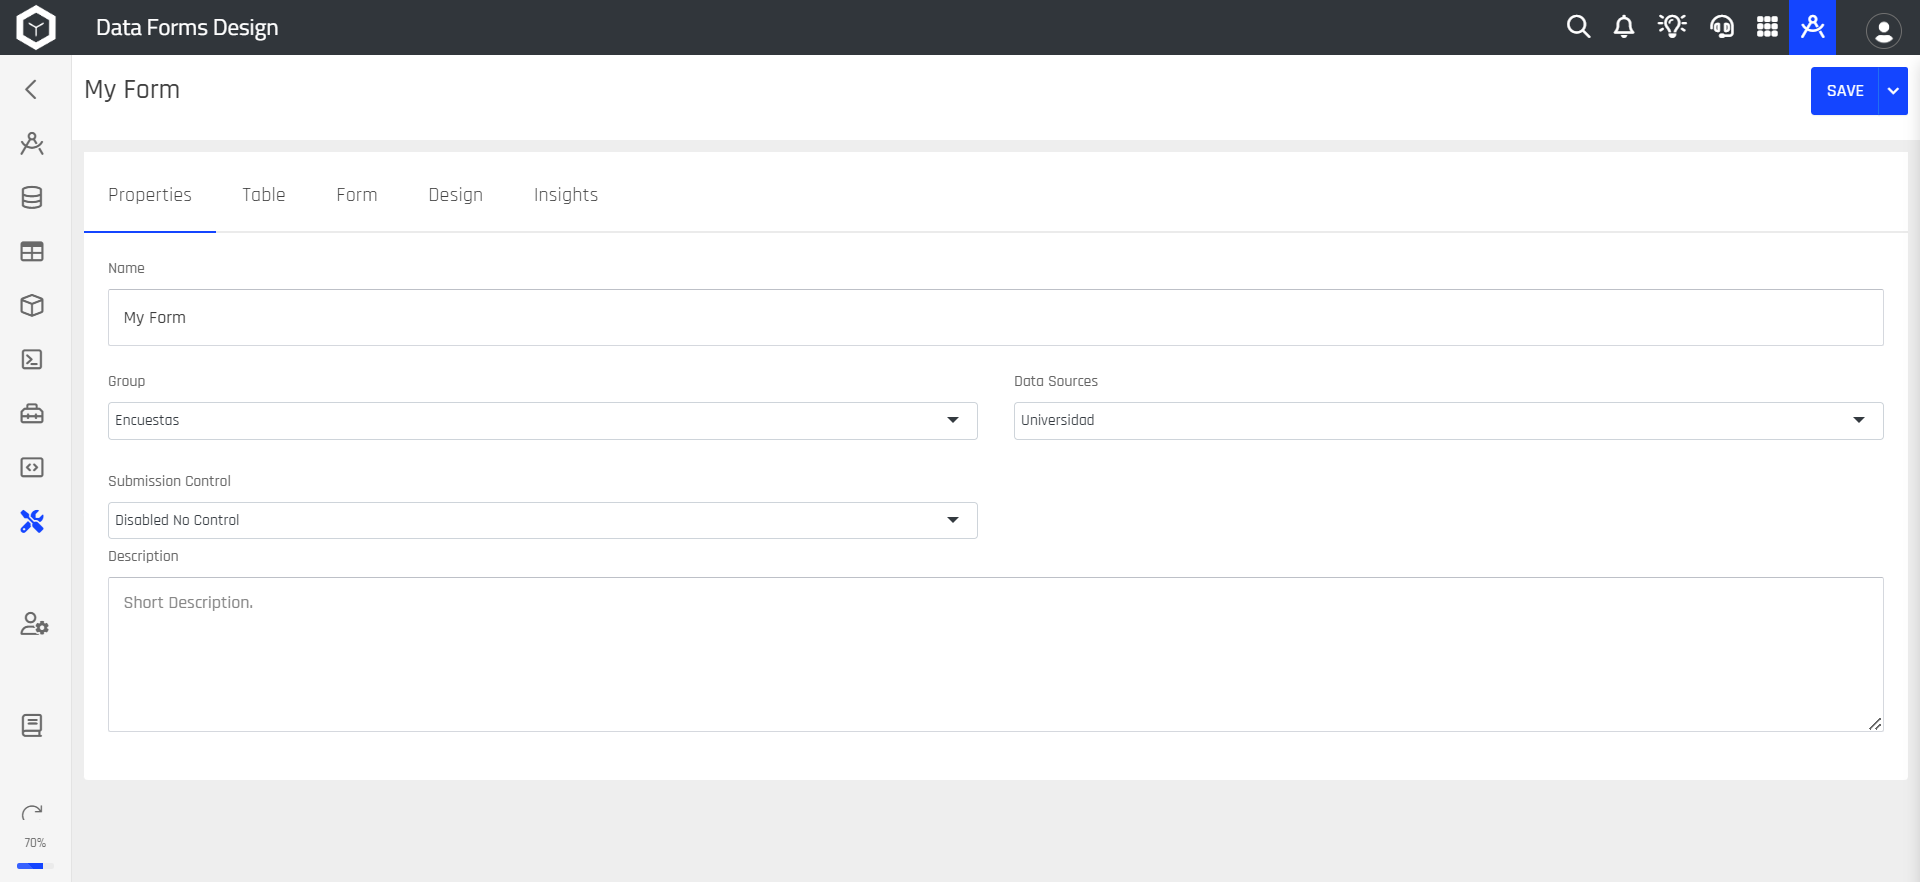
Step 4 You will then proceed to a new screen where you'll see the pre-configuration from the previous step.
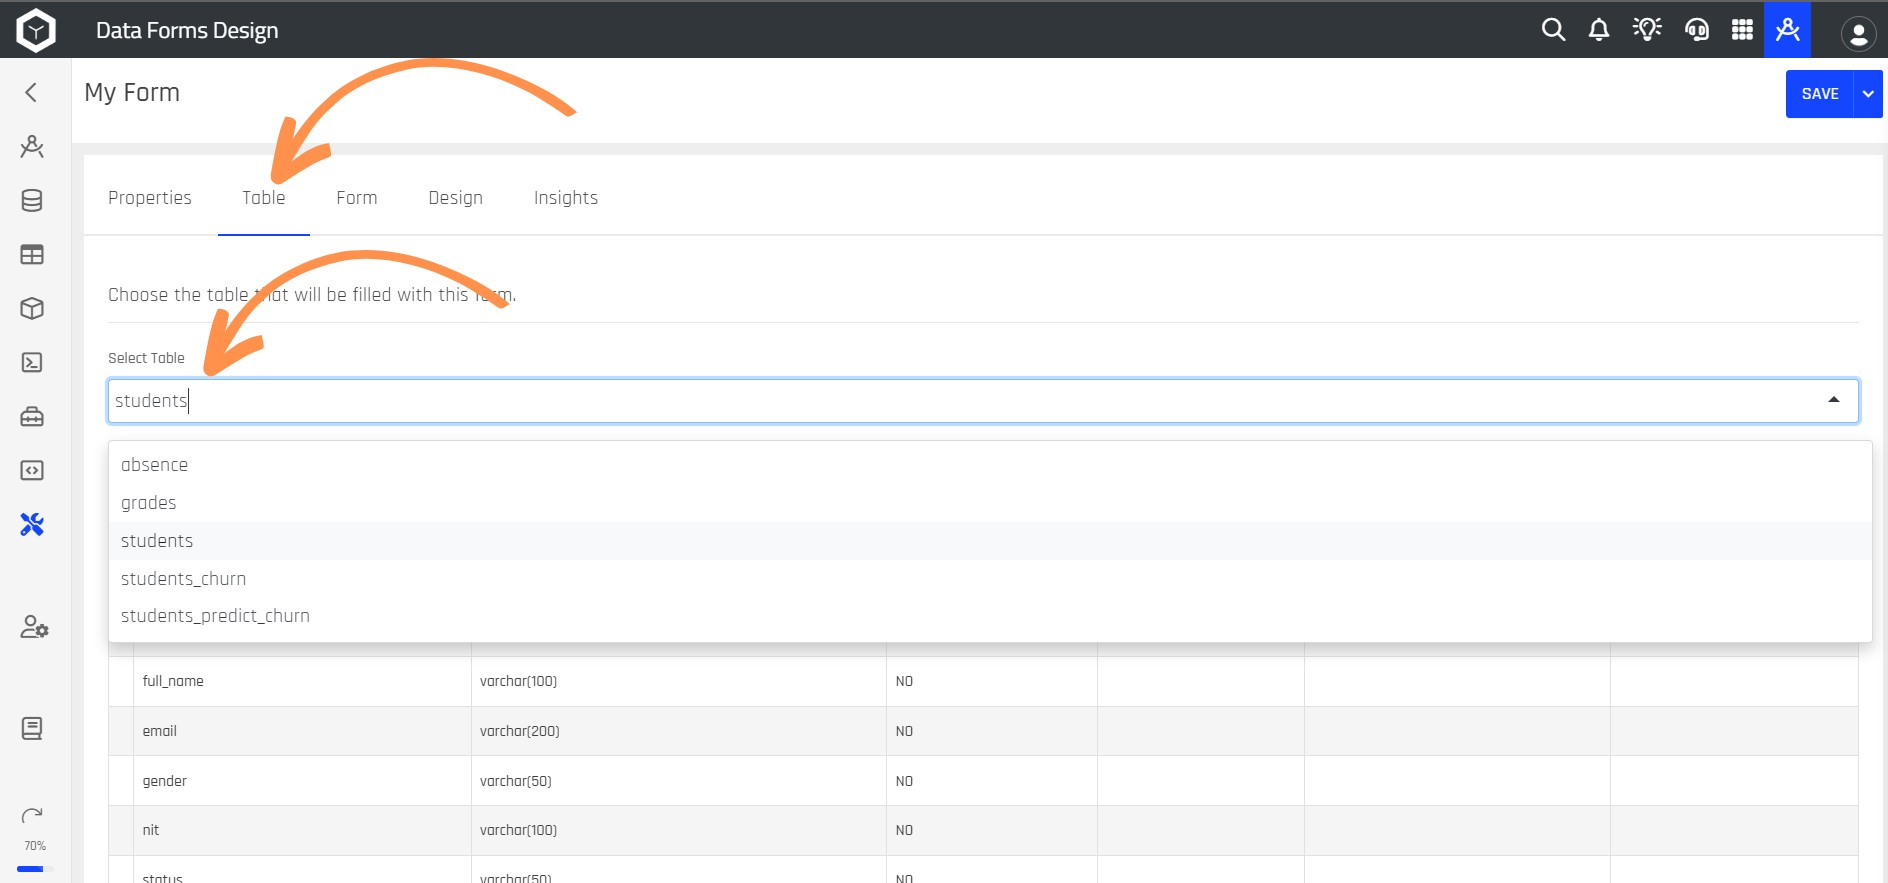
Step 5 Select the Table option and choose the table where you want to store the form's information.
Step 6Select the Form option and click the ADD SECTION button to start creating your form.
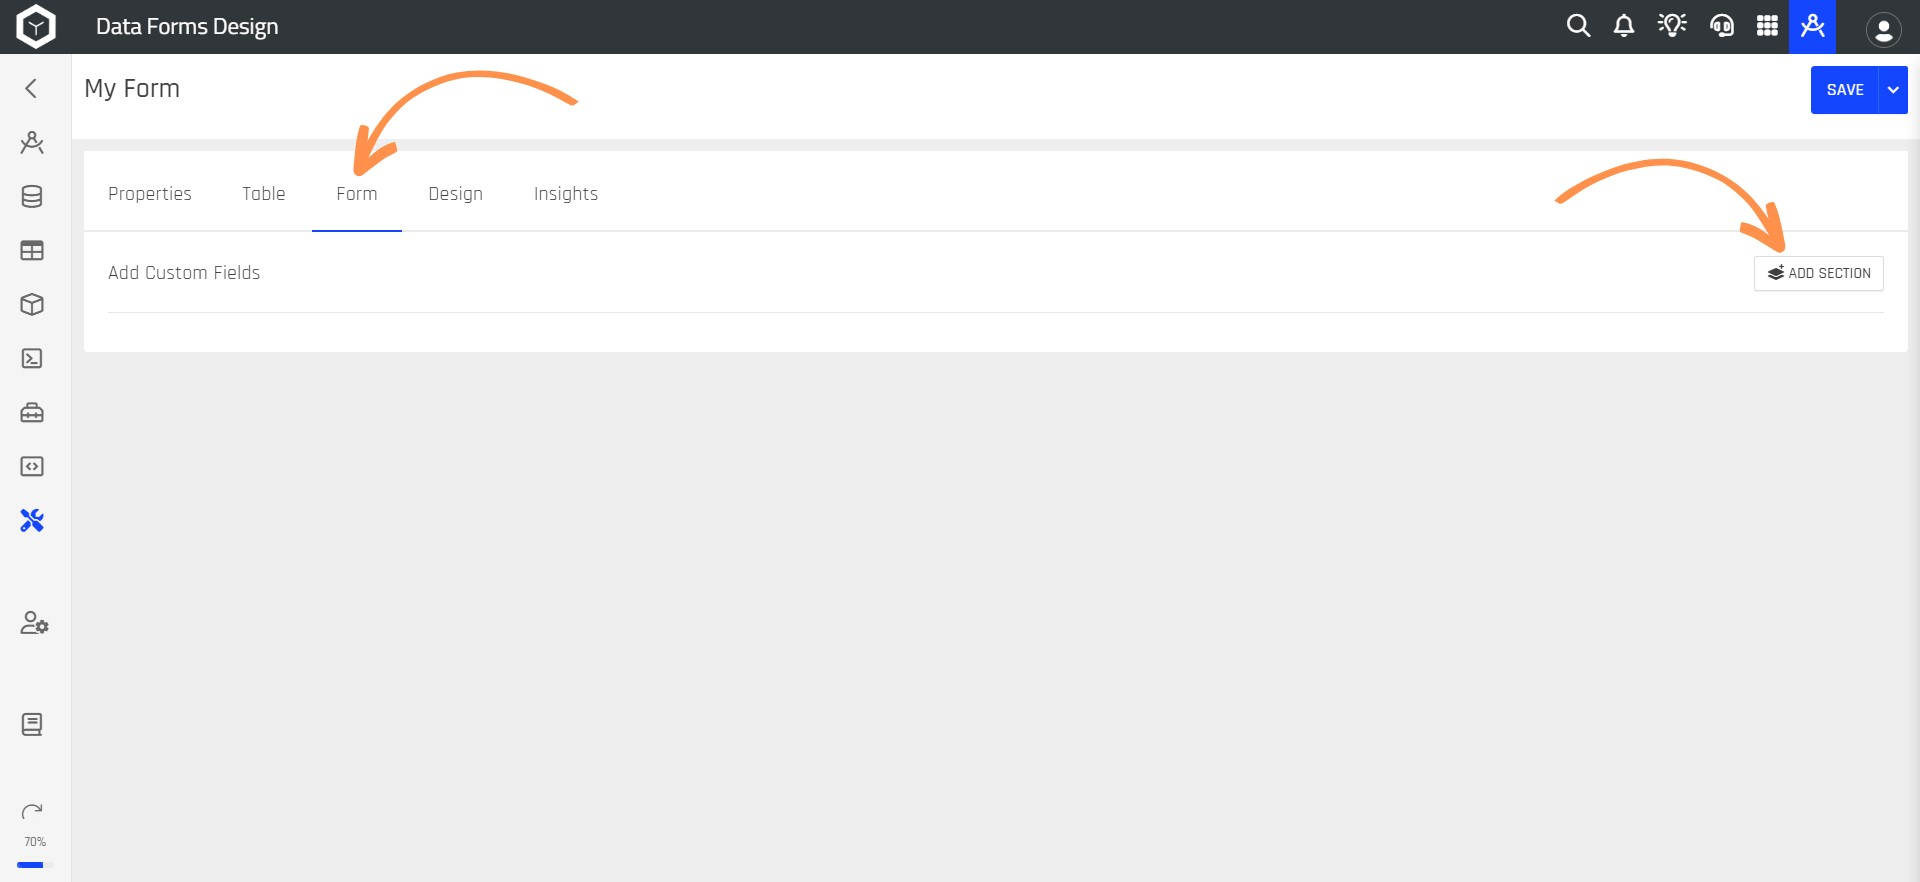
Sections of a FormThe forms can be divided into sections, this will help the user to know that each part of the form collects different data.
Step 7 Enter a name for the form section and an optional description. Then, click the SAVE button.
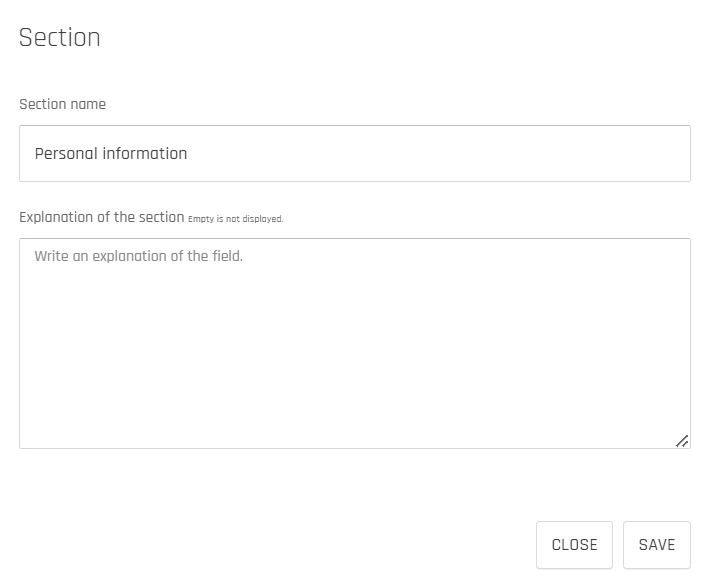
Step 8 Enter a name for the form section and an optional description. Then, click the SAVE button.
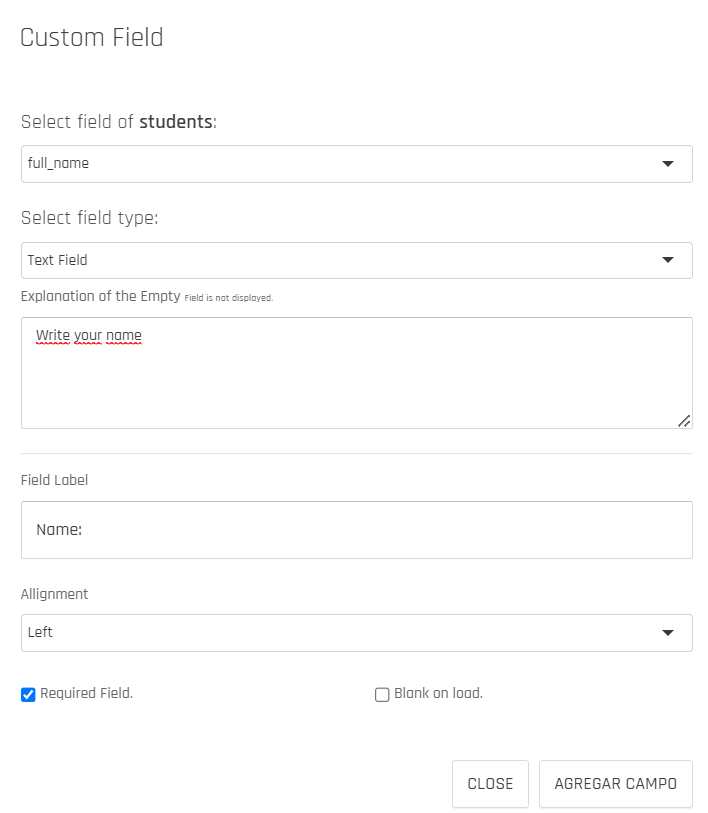
Step 9 Then a new window will open, where you must configure the field with information such as: field of the table where you will save the data of that field, type of field, description of the field, name of the field, alignment, if it is a required field or leave it in white.
The following table further explains each type of field:
| Field Type | Description |
|---|---|
| Text Field | This field allows for simple text input. |
| Text Area | This allows you to define a text field with multiple rows for large text input. |
| Chooser of an Option | This field allows you to define a list of options from which the user can select only one. |
| Multiple Choice Selector | This field lets you define a list of options, and the user can select one or more of these options. The result is stored as JSON in the destination table field. |
| Create Multiple Options | This field lets the user add multiple options on demand. The result is stored as JSON in the destination table field. |
| Date Field | Adds a field with a date and time picker. |
| Field Selection of an SQL | Generates a list of options based on data obtained from an SQL query executed in the repository. |
| Integer Incremental Field | Simulates an auto-incrementable field in the form. |
| Hash Key | Enables a primary key using a unique "string hash" to prevent duplicates and maintain a unique primary key. |
| TimeStamp Field | Adds a timestamp field to track the date and time of the data record obtained by the form. |
| Email Field | Allows entering email addresses. |
| Password Field | Adds password input, hiding the entered characters. |
| Phone Field | Allows entering phone numbers. |
| Image Upload Field | Enables uploading images from the camera or gallery. |
| Video Upload Field | Allows uploading videos. |
| File Upload Field | Allows uploading documents. |
| Map Geo Point Field | Automatically captures the geographic point. |
| Map Select Geo Point Field | Allows selecting a point on a map. |
| Signature Field | Allows entering signatures. |
| Default Value | Sets a fixed value whenever the form is filled. |
| DataKubes User Session | Automatically stores the registered user's email in the application. |
| DataApps Session Variable | Fills the field with data pre-set in the DataApp configuration. |
| DataApp Global Variable | Fills the field with data pre-set in the DataApp configuration. |
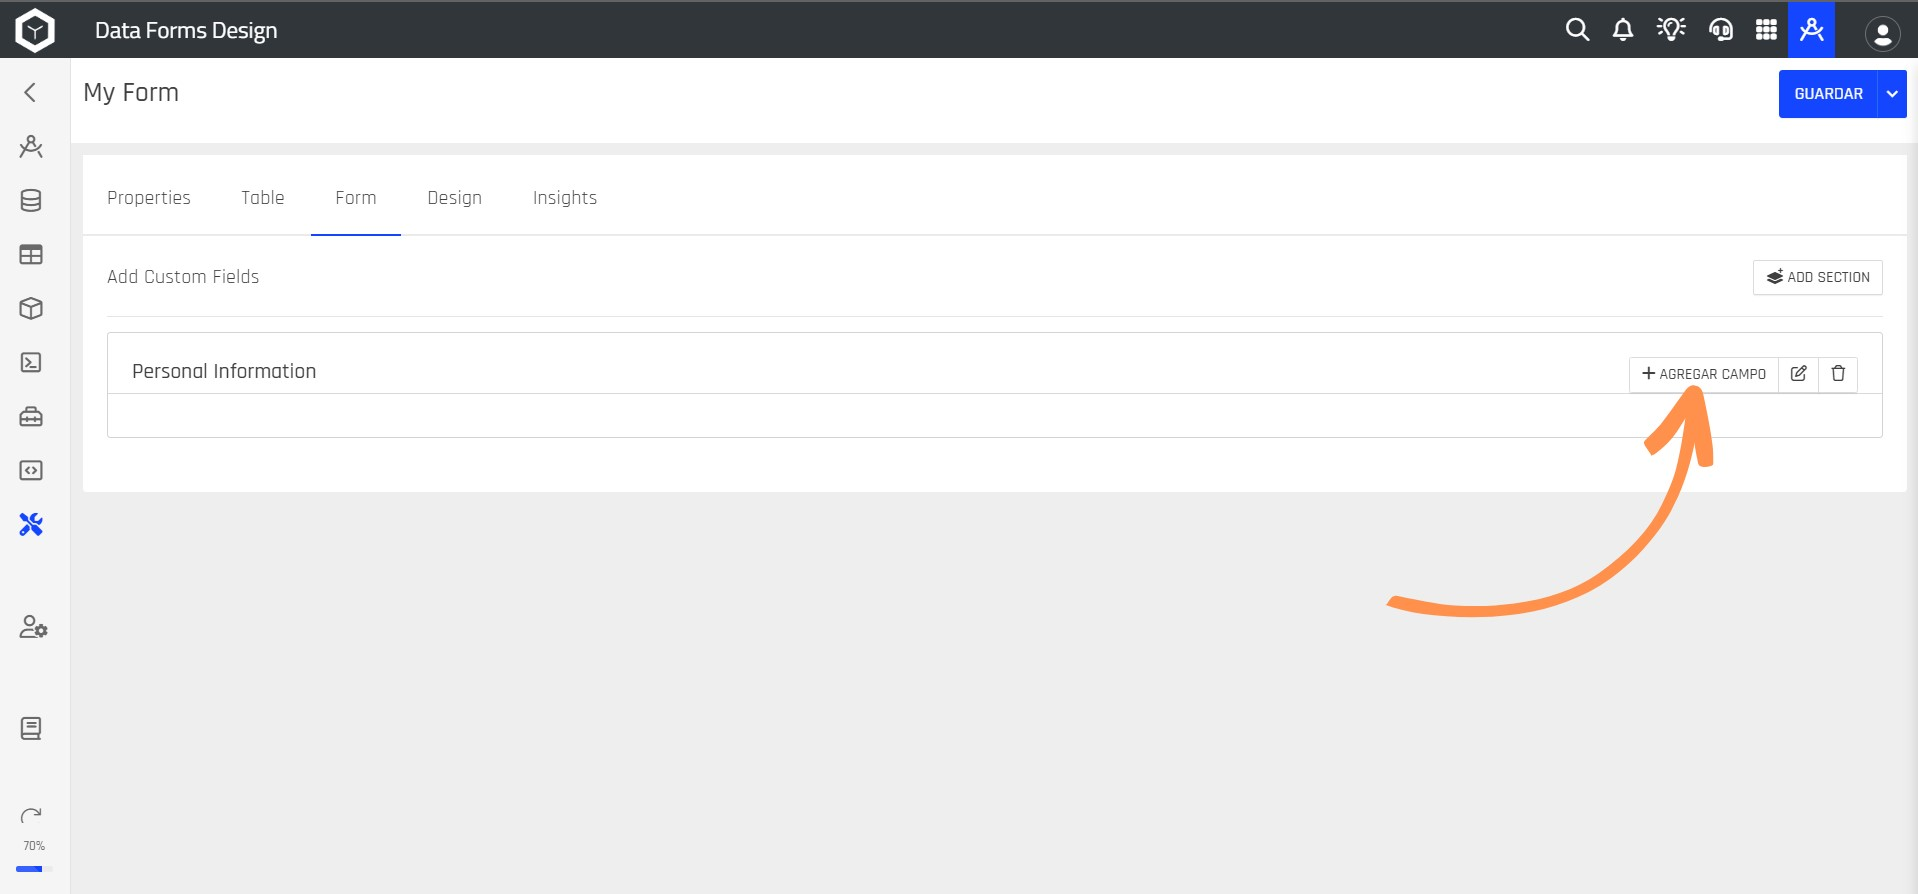
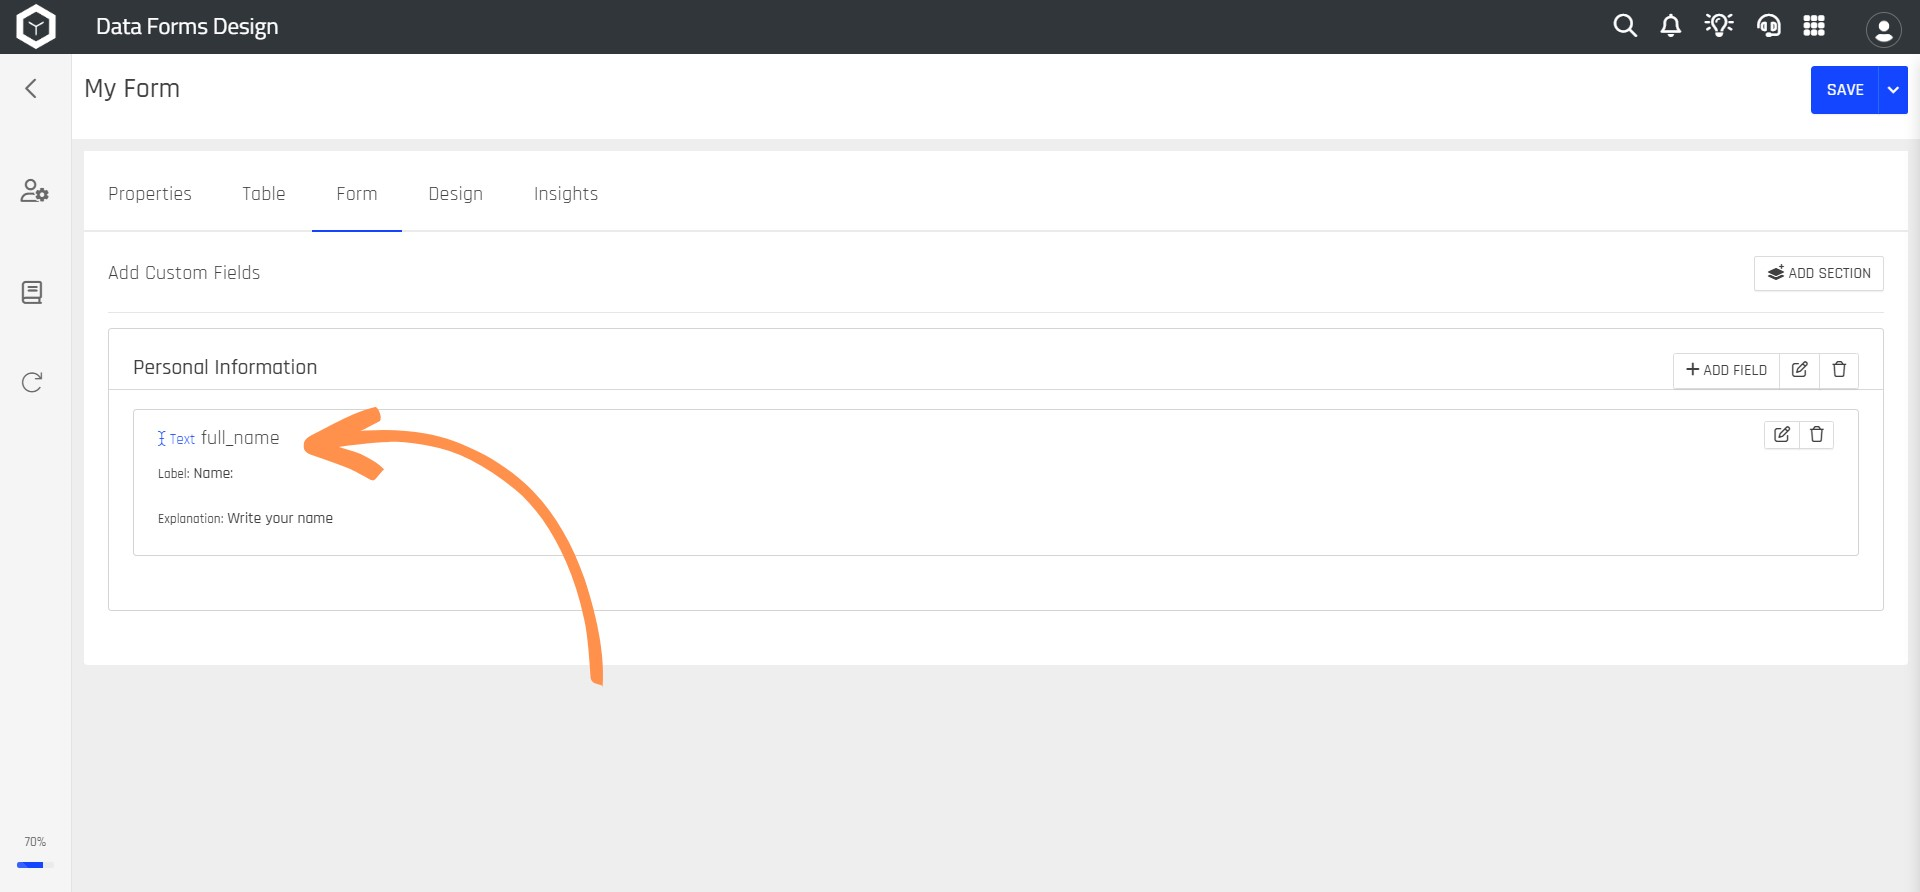
Step 10 Click the Add Field button and you will be able to see your field already created within the section that I created
Field DuplicationOnly one field from the destination table is allowed to be added to the form. Duplicate fields are not allowed.
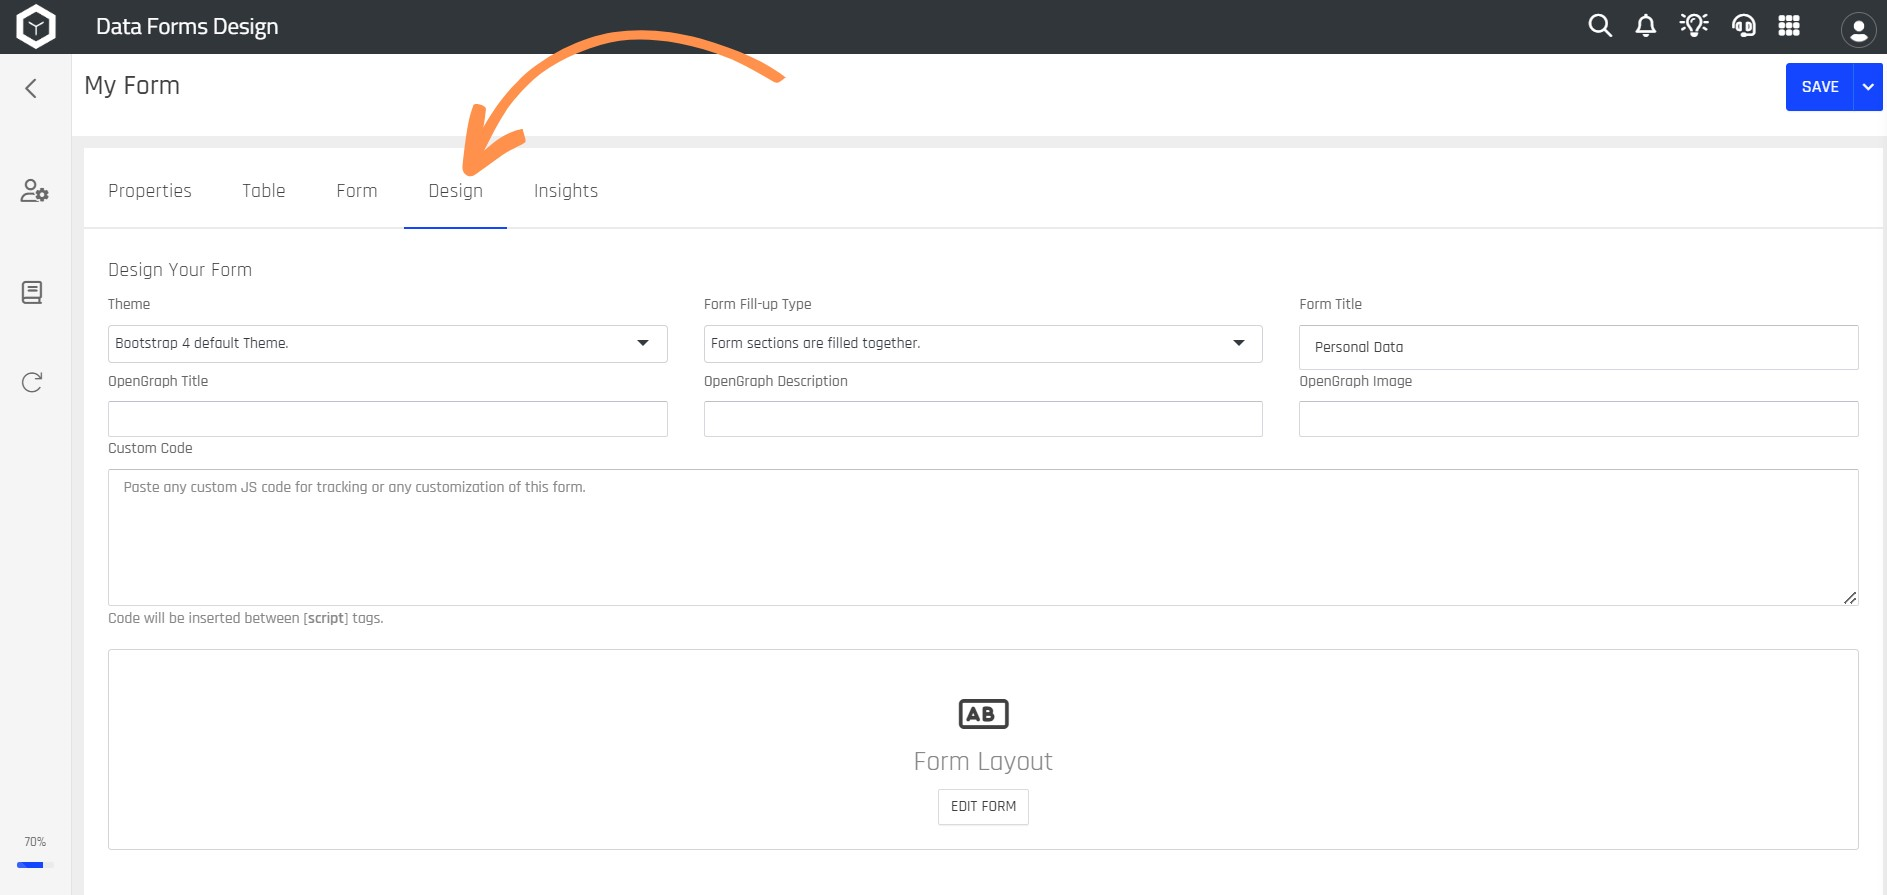
Step 11 Click on the Design option. Where you can configure the design of your form with the options of: Theme, Form Fill-up Type, Form Title, OpenGraph Title, OpenGraph Description, OpenGraph Image and Custom Code (if you want the Form to be more personalized).
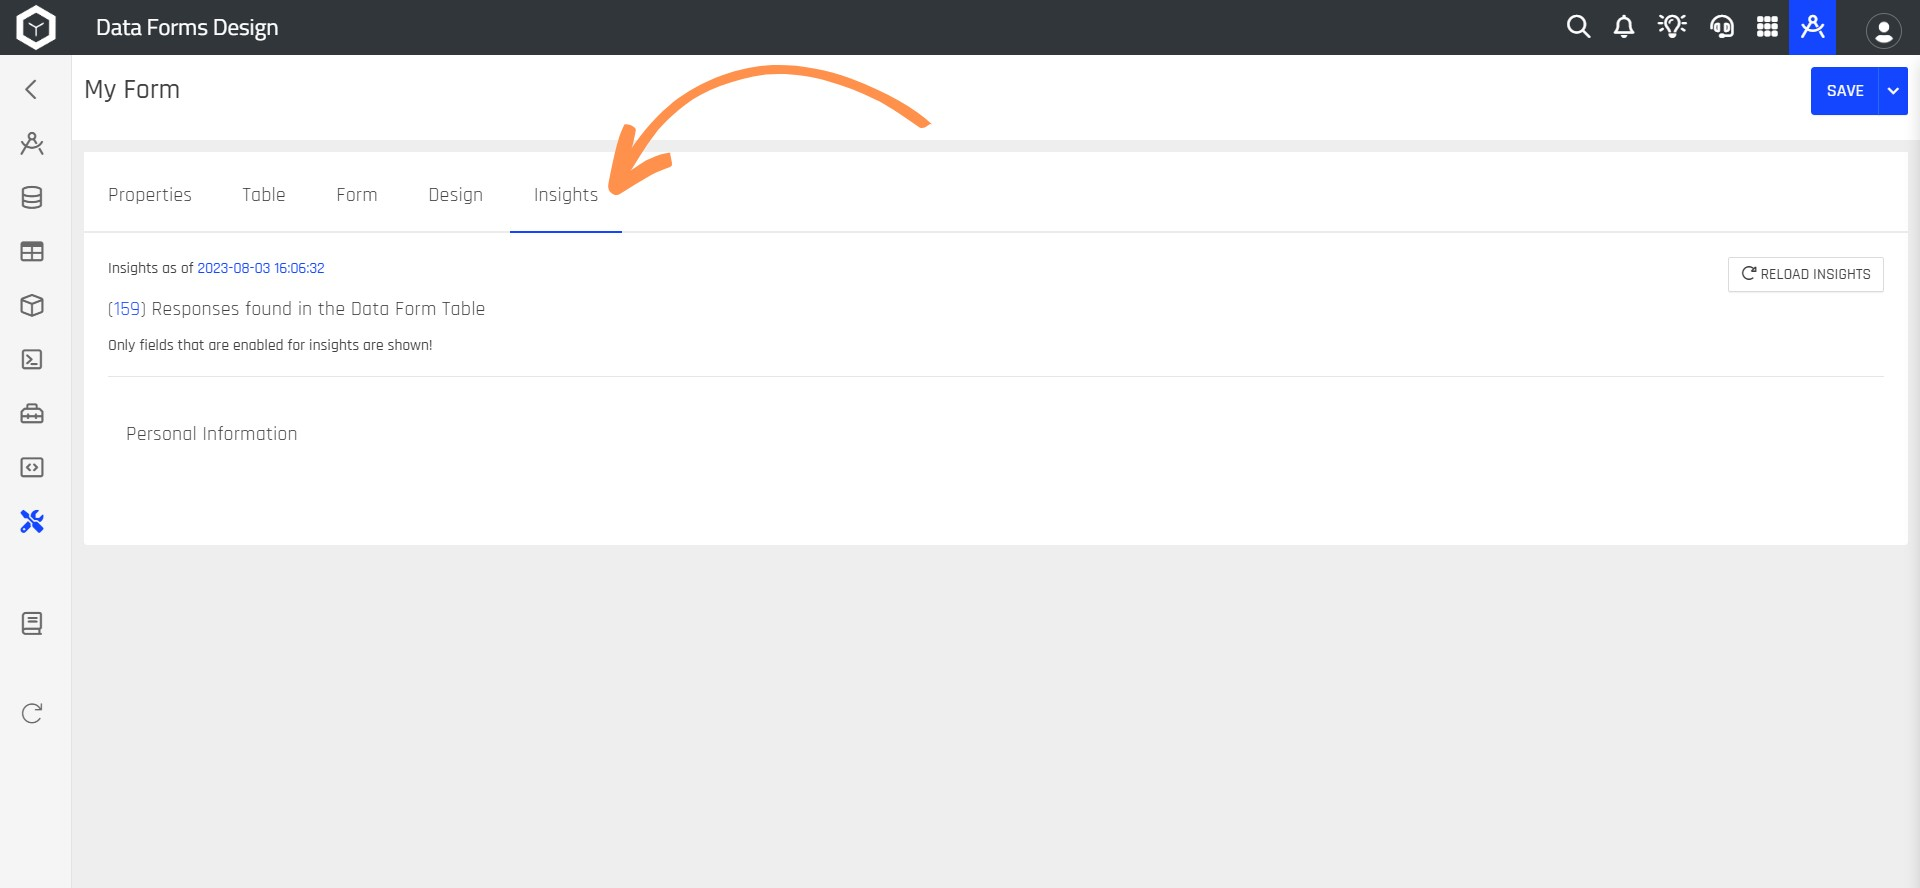
Step 12 Select the Insights option to observe the results of the forms.
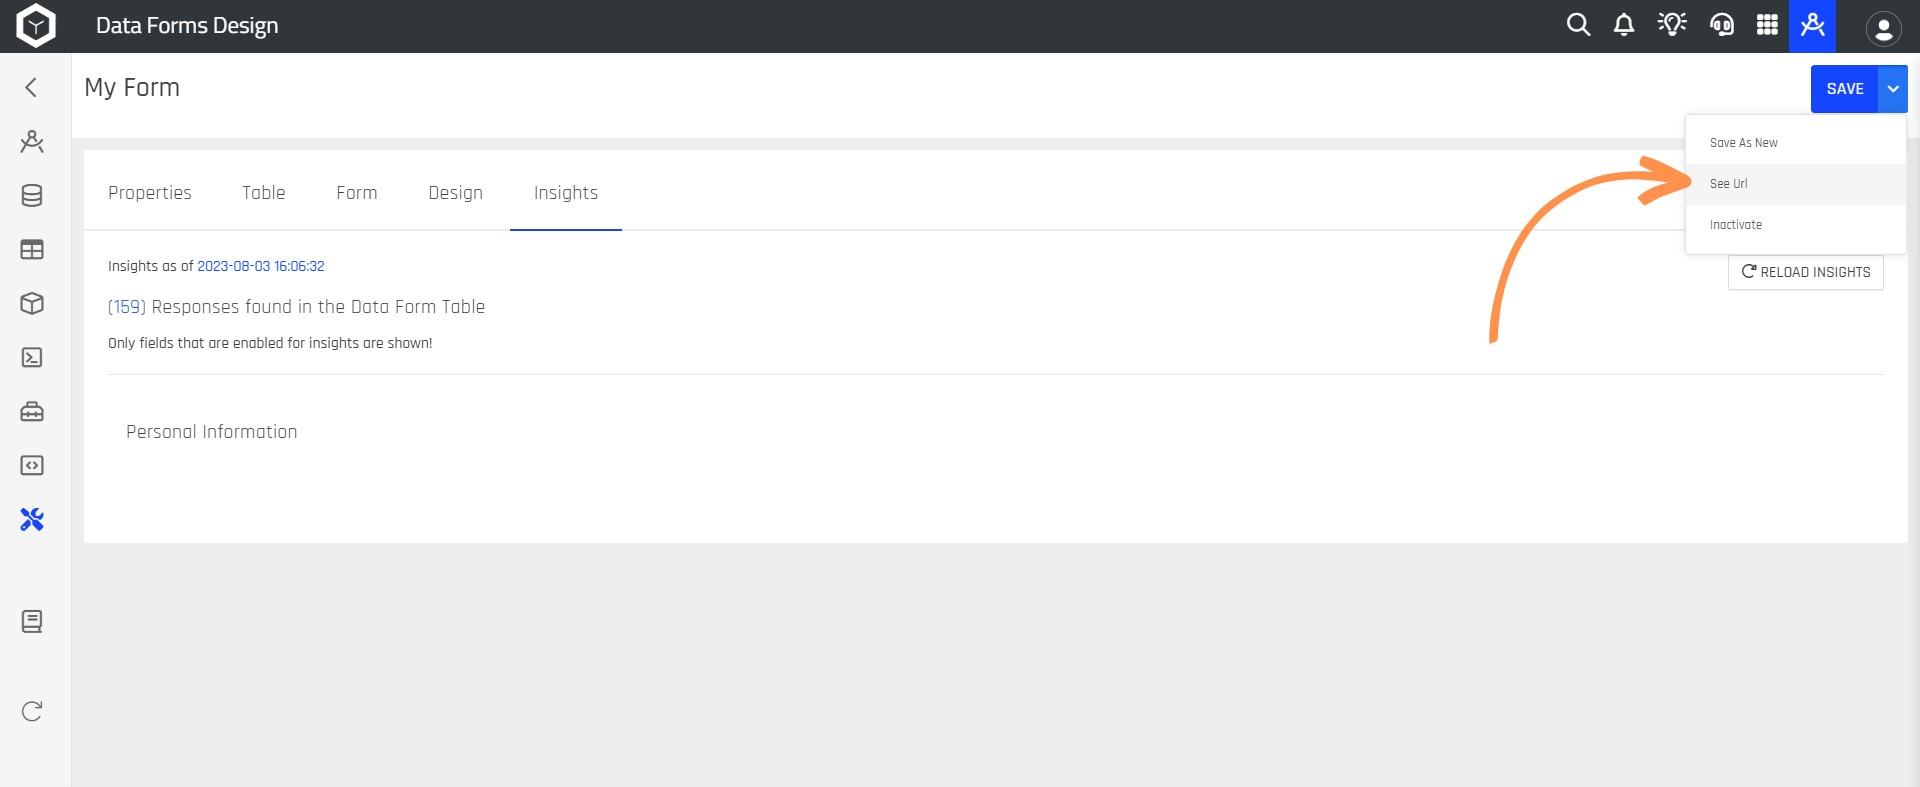
Step 13 To view your form click the SAVE button, then click the button next to SAVE and click the SEE URL option.
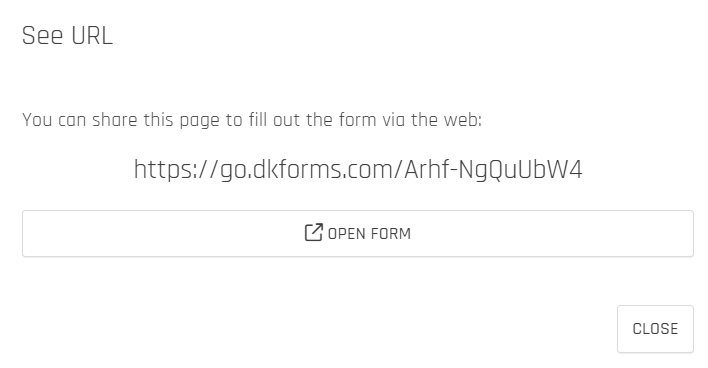
Step 14 Then you can copy and paste the link shown or click the OPEN FORM button.
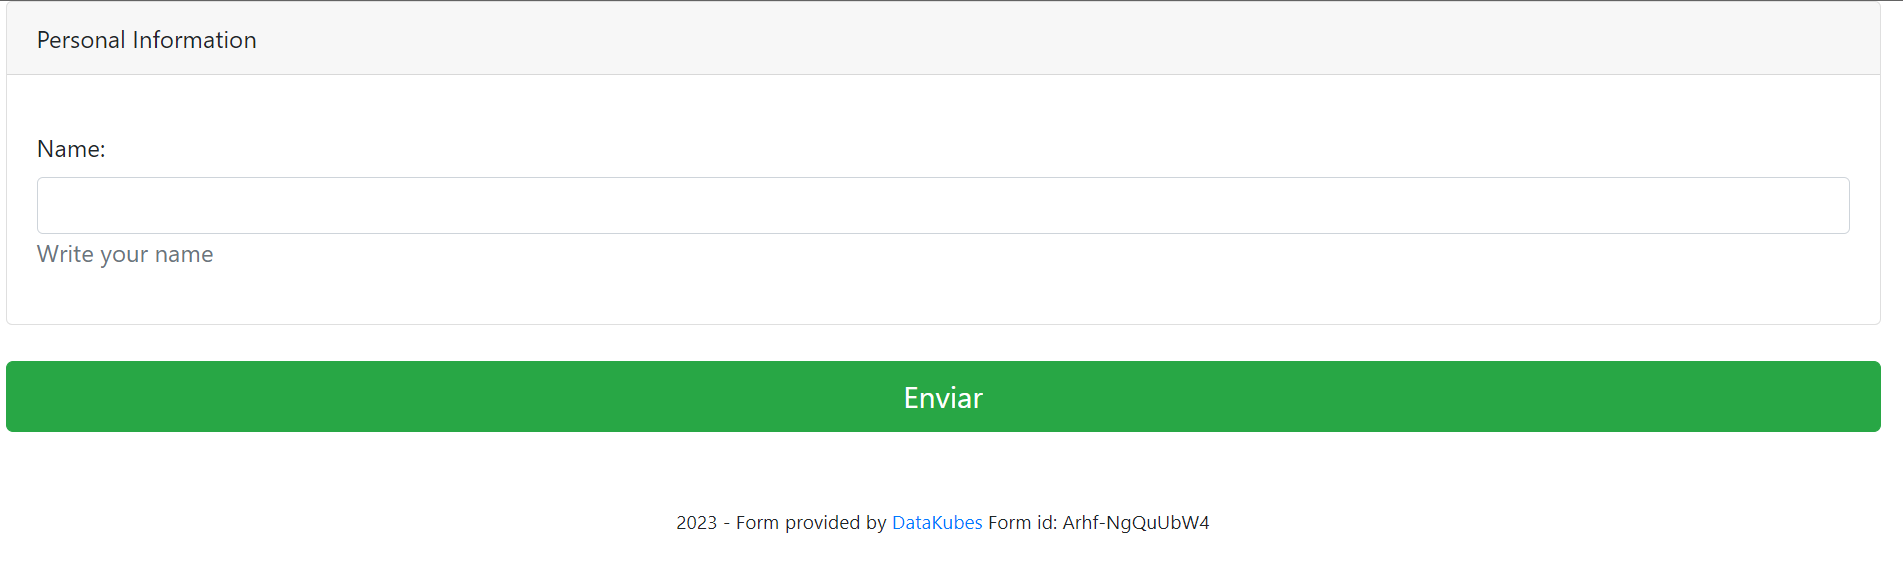
Step 15 You will then be able to see your DataForm ready to use.
This way you have created your first DataForm. You can also use the forms to create data capture screens to complement or analyze processes in your organization.
Updated over 1 year ago