DataPipes
What are DataPipes?
A DataPipe is a tool that enables the creation of data extraction pipelines between external data sources and DataKubes repositories. It facilitates the mapping of tables between the two sources and the extraction of copies or changes from the sources into the repositories.
How to Create a DataPipe
To create a DataPipe, follow these steps:
Step 1: On your Orchestrator's Home page, navigate to the DataPipes option.
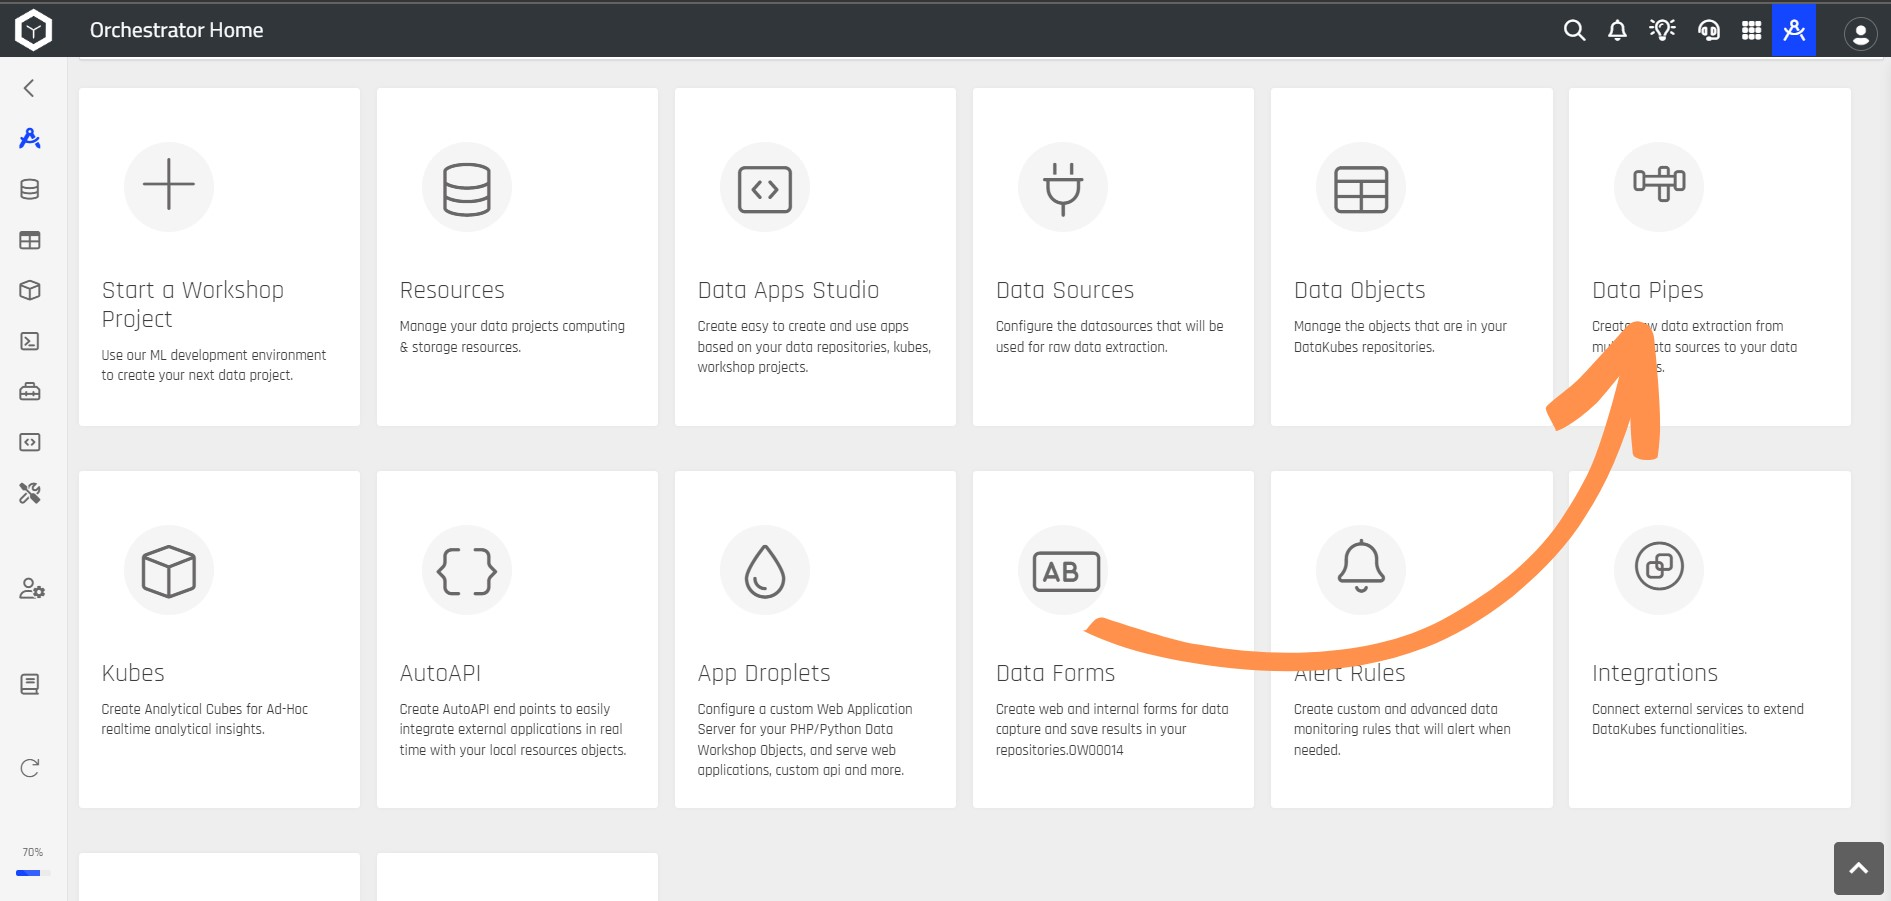
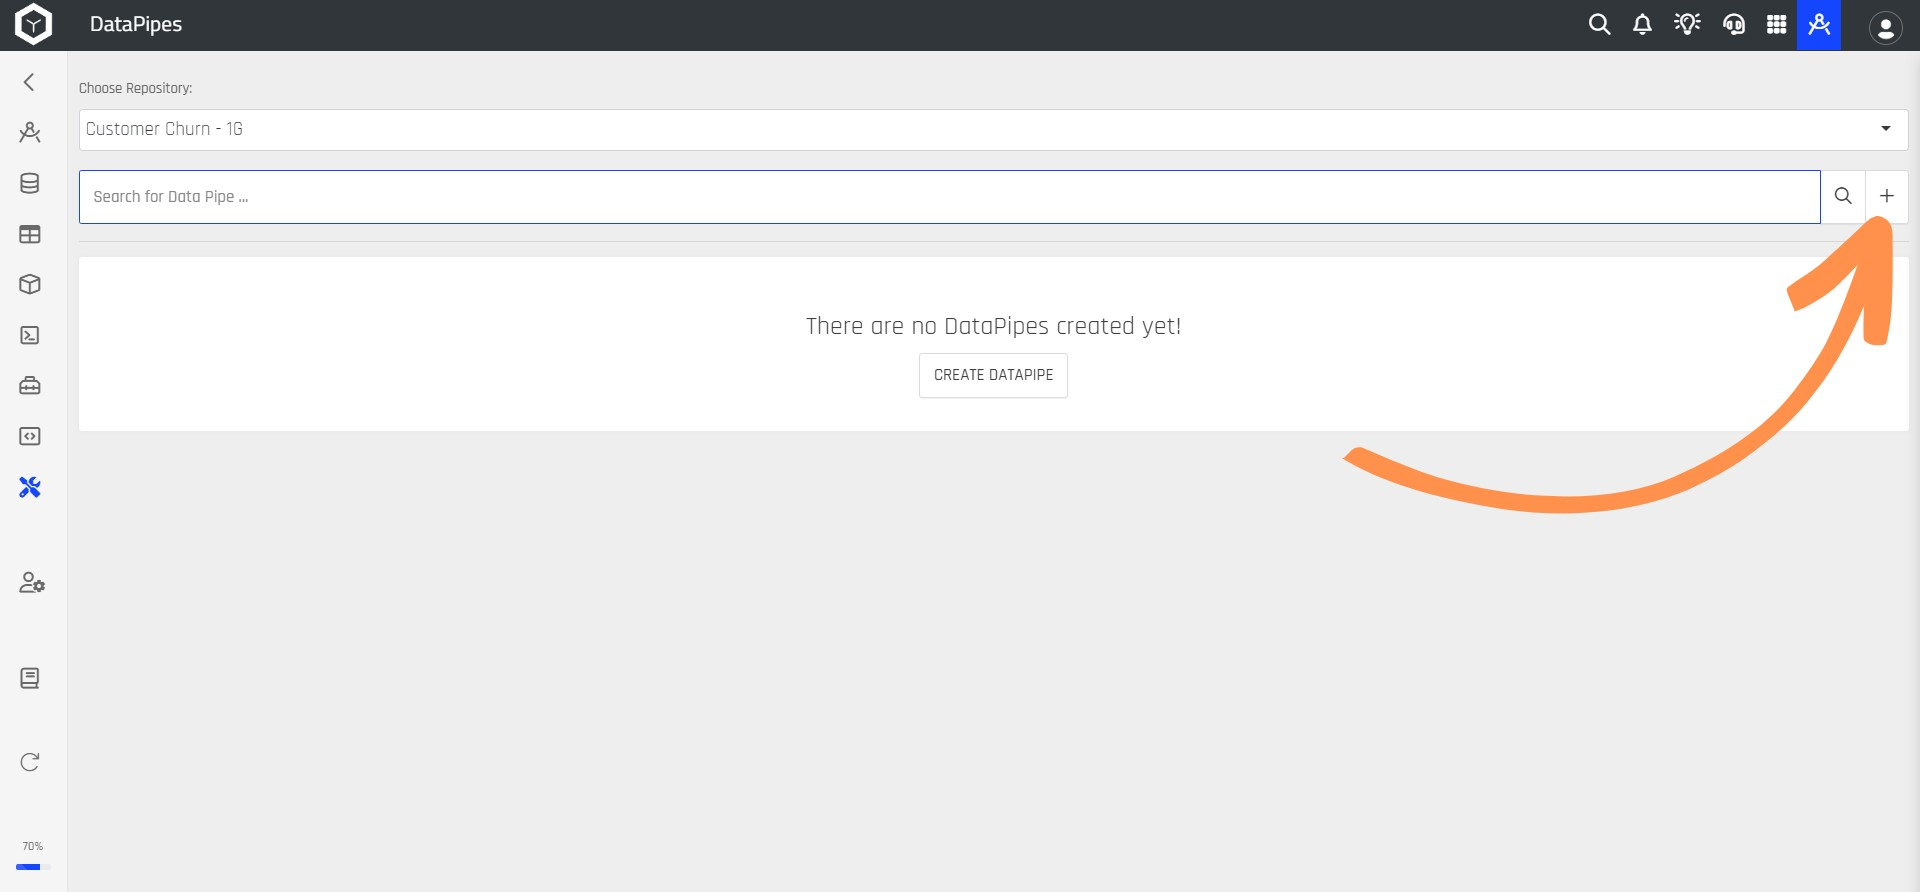
Step 2: Then, click on the + icon to initiate the creation of a DataPipe.
Step 3: This will open a new screen where you need to complete the details to create the DataPipe.
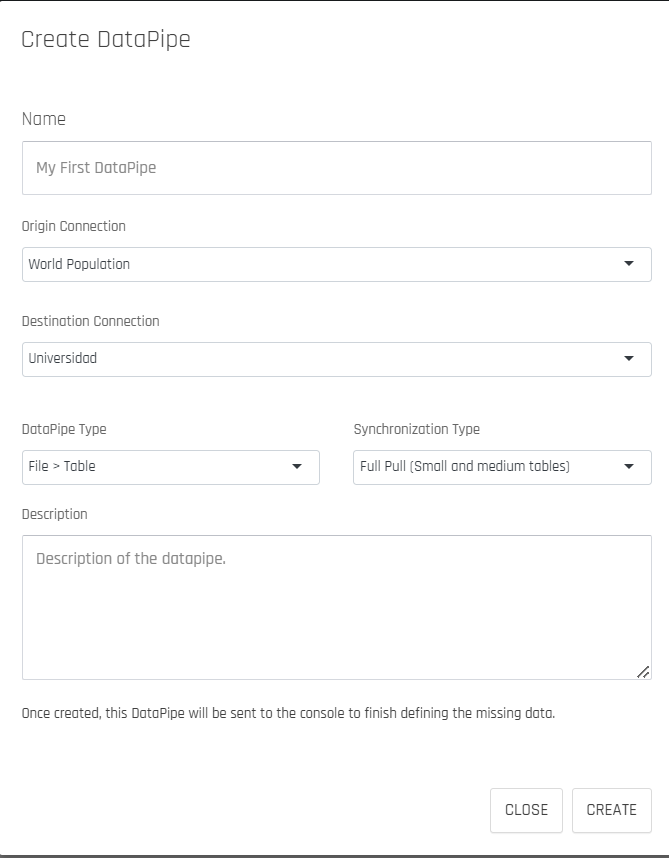
The following table explains each section of this form in detail:
| Section | Description |
|---|---|
| Name | In this section, you need to provide a name for your DataPipe. |
| Origin Connection | Choose the data source for your DataPipe. This can originate from a Data Source or a Repository. |
| Destination Connection | Specify where you want the DataPipe's data to be stored. |
| DataPipe Type | This defines whether you wish to extract data from a table in the source data to a table in the chosen repository, or if you intend to obtain a SQL result, which will be extracted into a table within the repository. This proves helpful when you need to extract data residing in different tables in the source. |
| Synchronization Type | This option allows you to determine whether you want to extract the complete dataset every time the DataPipe runs, or if you prefer an initial full extraction followed by only extracting changed or inserted data based on a primary key or timestamp field, or both. |
| Description | Optionally, you can include a description about the DataPipe you're creating. |
RequirementsA DataPipe can only be created if a Data Source exists. For more information about Data Sources, consult the documentation Connecting Data Sources.
Step 4: Once you've filled in the form, click the CREATE button.
Step 5: Subsequently, you'll be directed to a new window to continue configuring the DataPipe. In the Name and Type section, you'll find the name, configuration type, and description you provided in the previous step.

Step 6: Select the DataPipe Data Setting option, where you should choose the table from the Data Origin to copy that data into the Data Destination table.
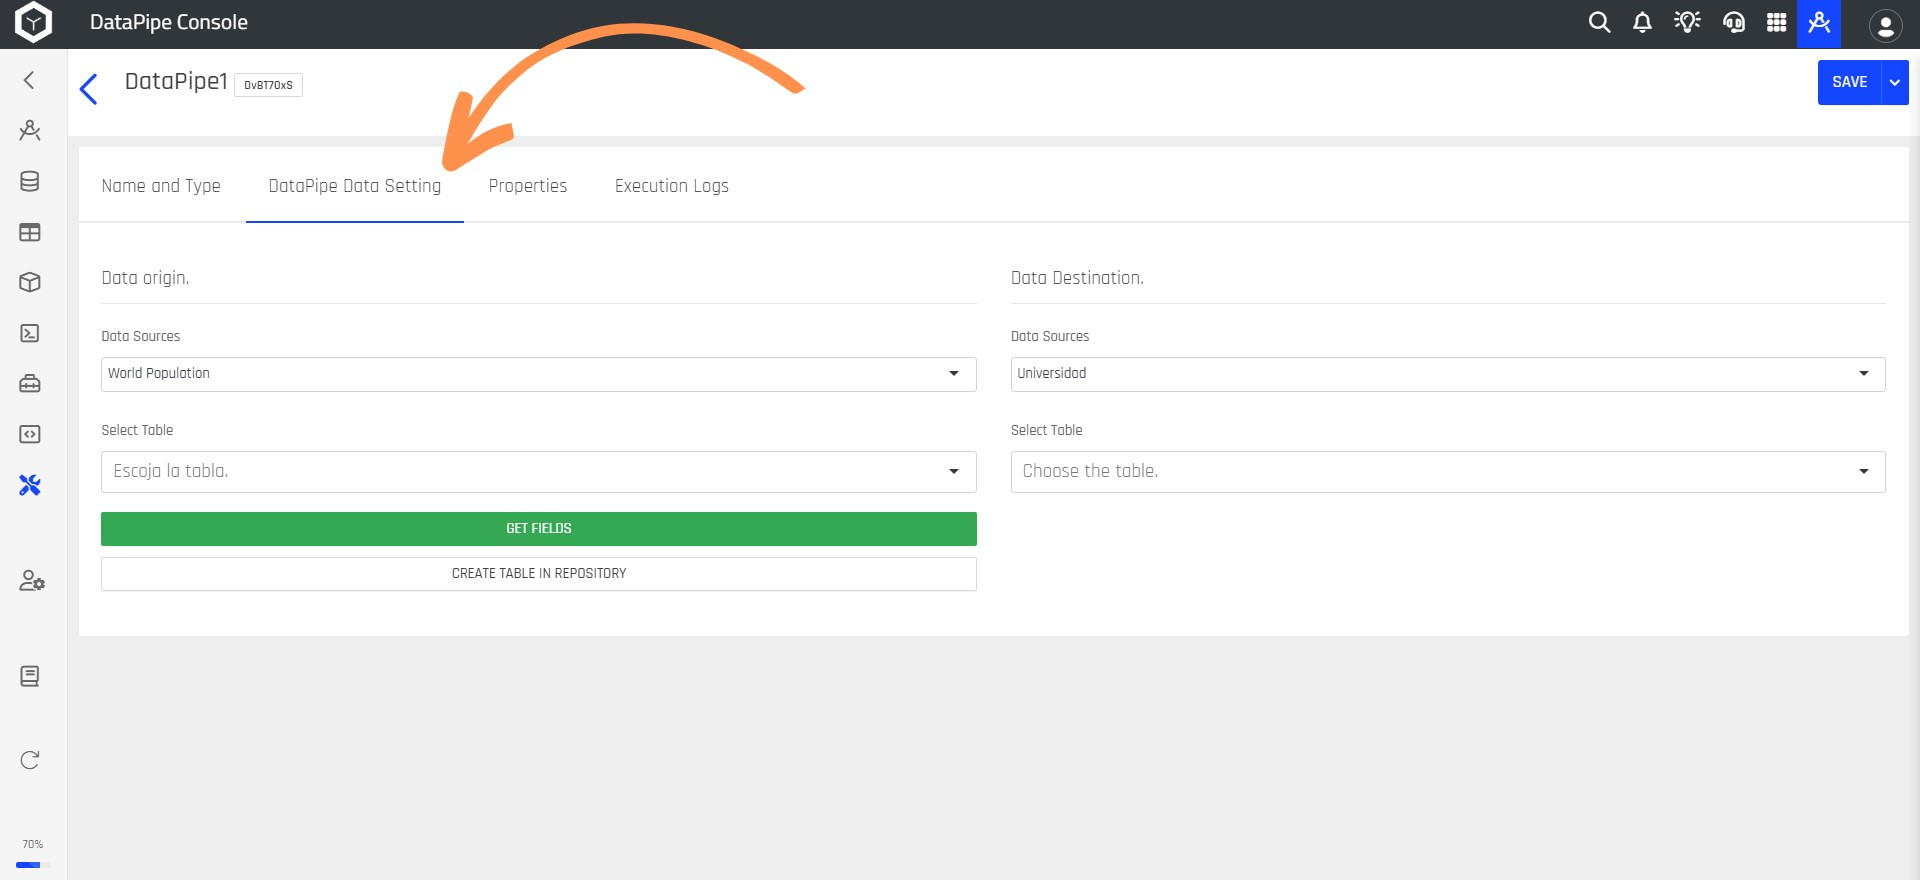
Saving Data to Destination TableIf you'd like to save your data in a Data Destination table that doesn't exist yet, click the CREATE TABLE IN REPOSITORY button to create it in the Data Destination.
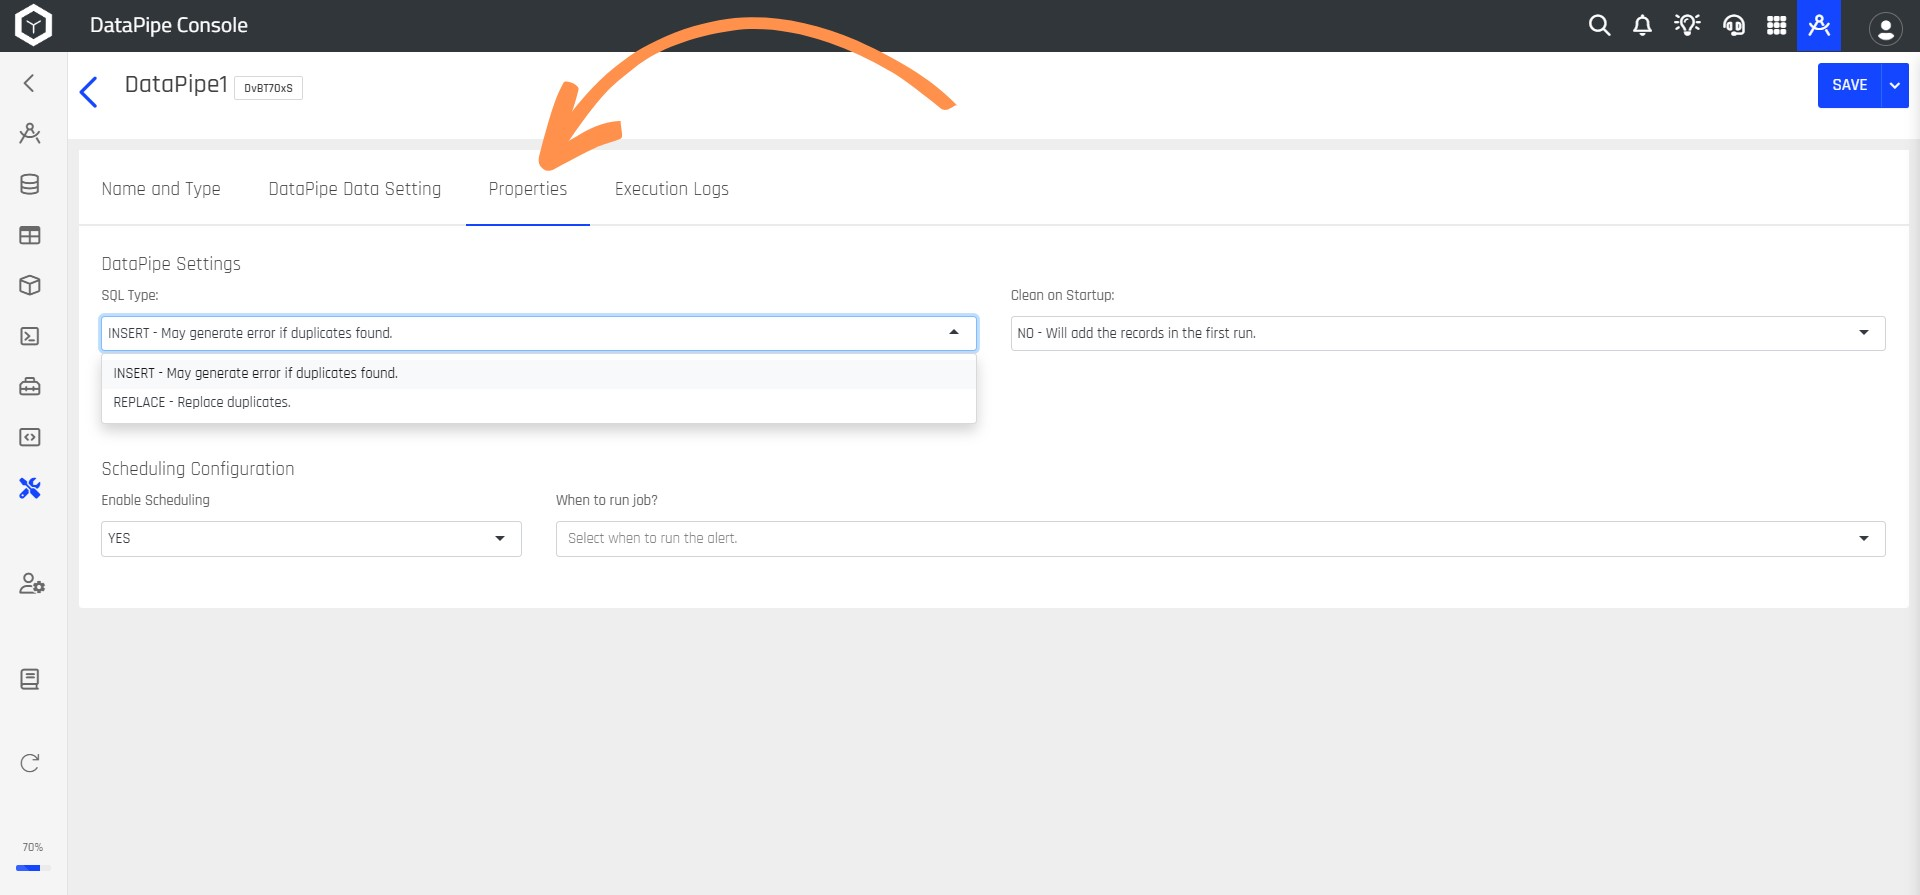
Step 7: Choose the Properties option to determine the type of SQL function (Insert or Replace), specify whether you want the DataPipe to run automatically, and decide if you want to clear the table each time the DataPipe runs.
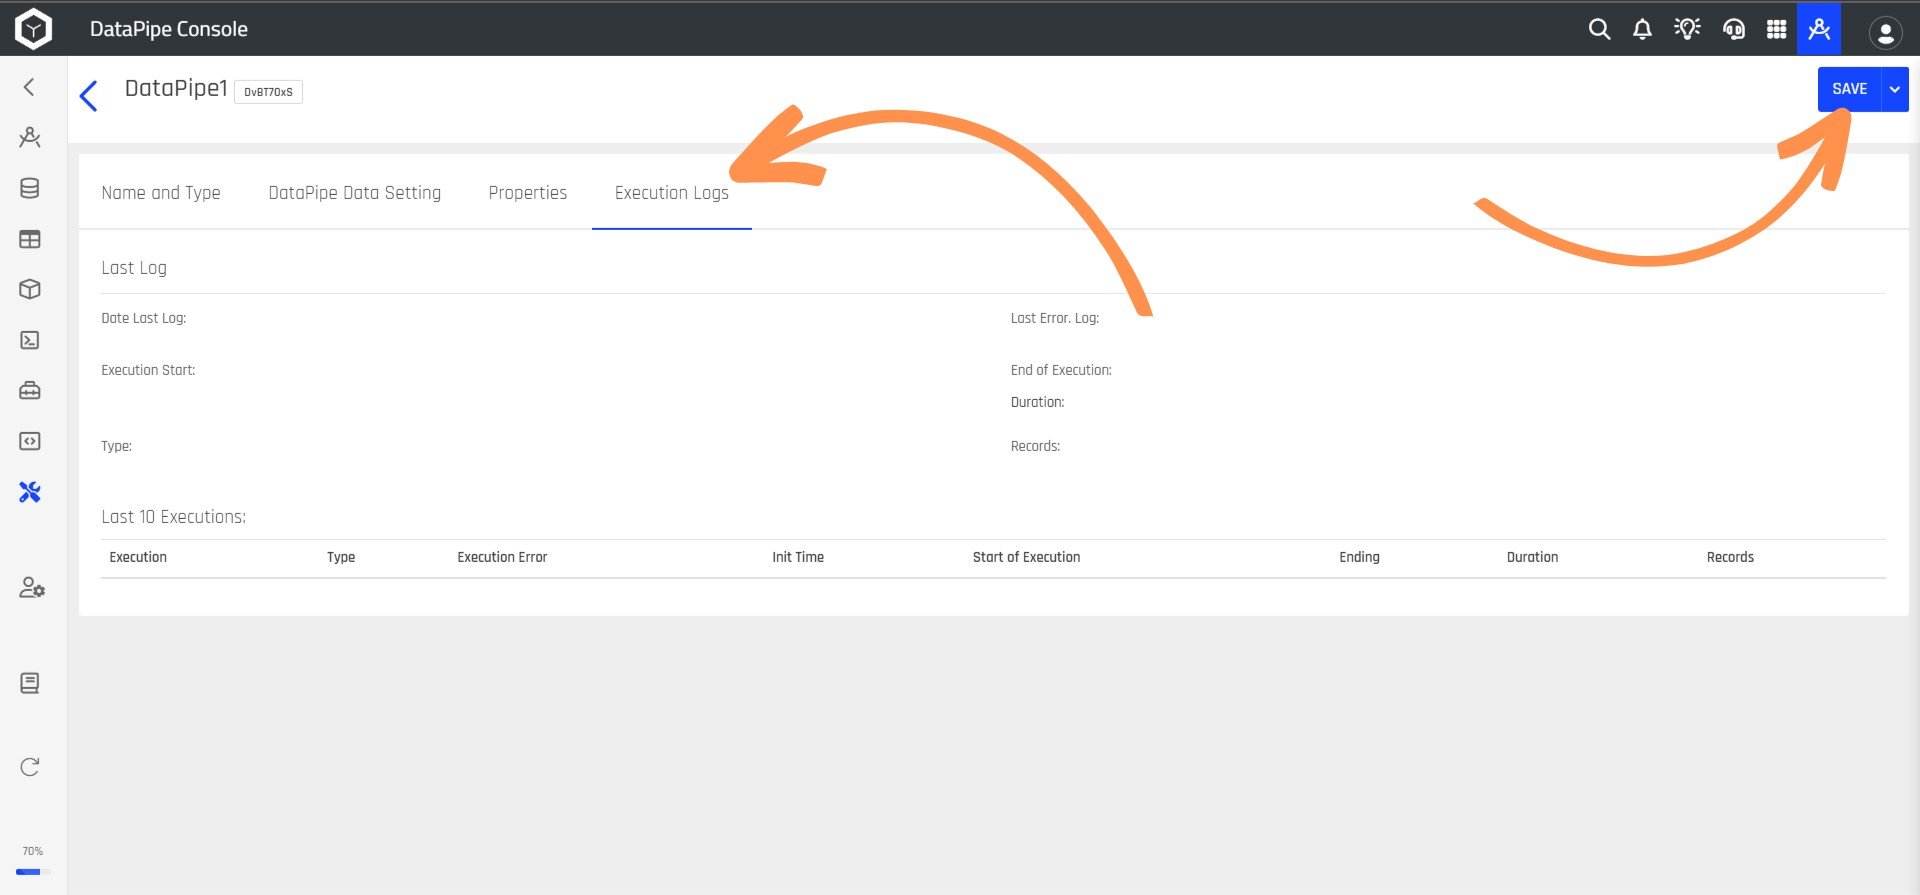
Step 8: Clicking on Execution Logs will display all the executions of the DataPipe. After configuring your DataPipe, click the Save button.
Step 9: After saving, your DataPipe will be listed.
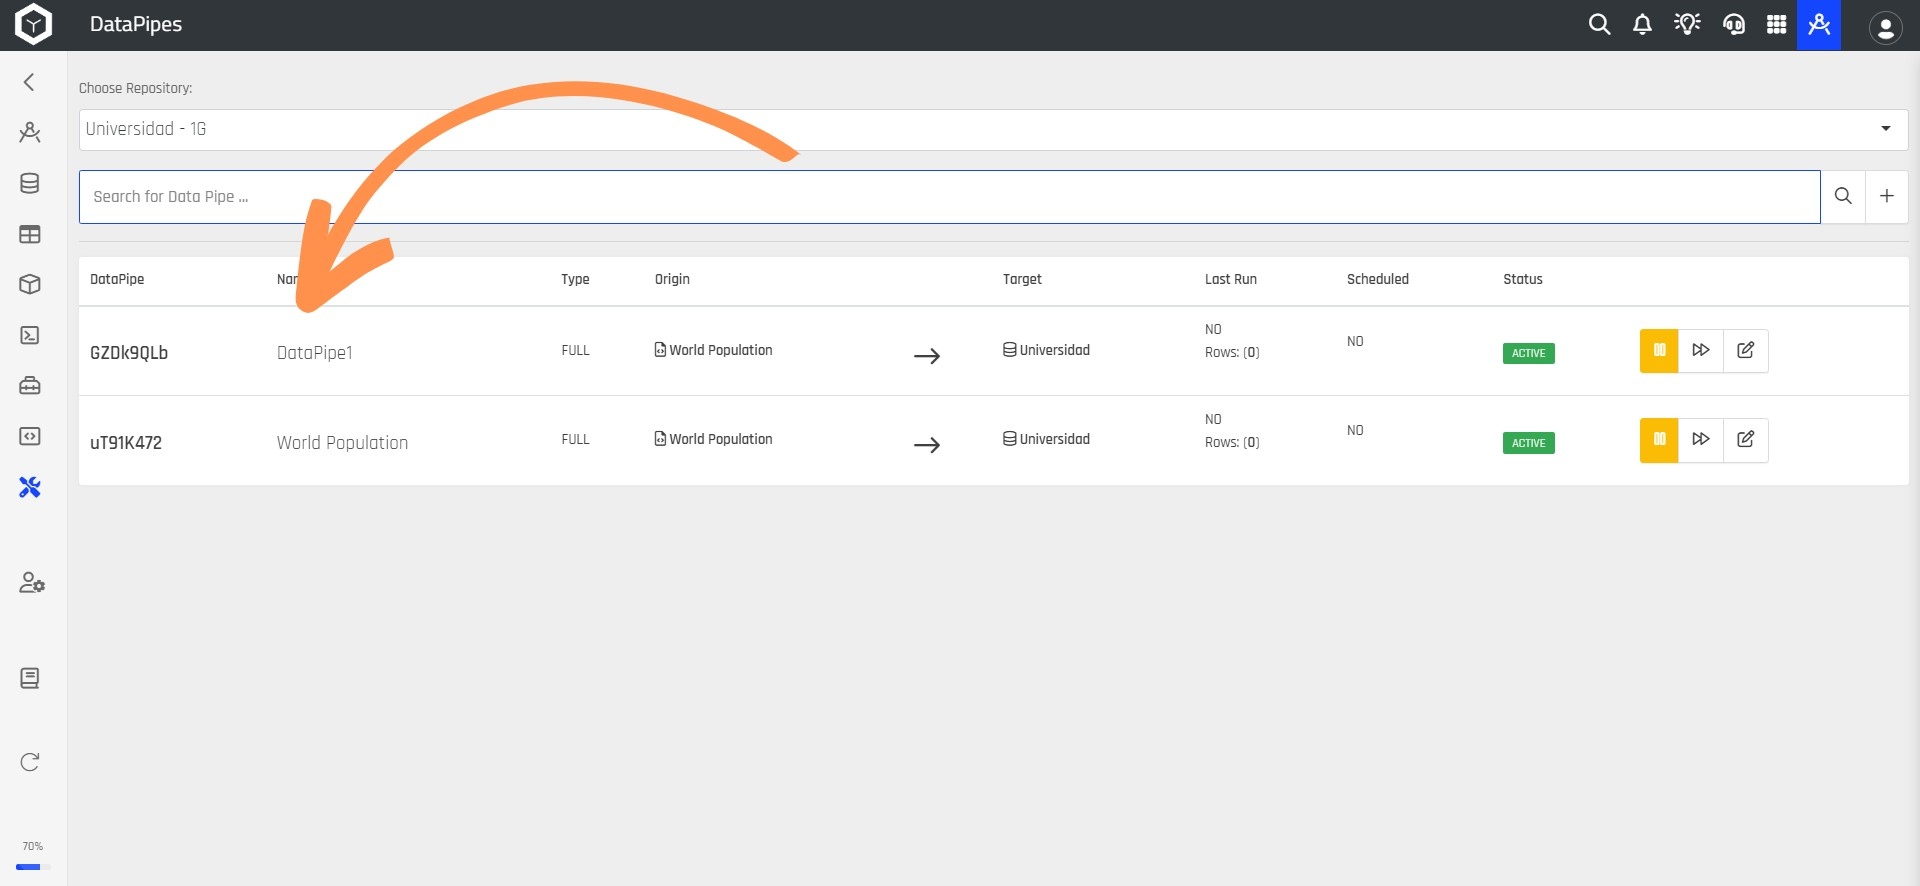
By following these steps, you've successfully created and configured your DataPipe.
Updated over 1 year ago