Machine Learning Example in DataKubes
AI Customer Churn Example
Building a Machine Learning Model Quickly with DataKubes AutoML
In this example, you'll learn how to quickly build a Machine Learning model using DataKubes' AutoML.
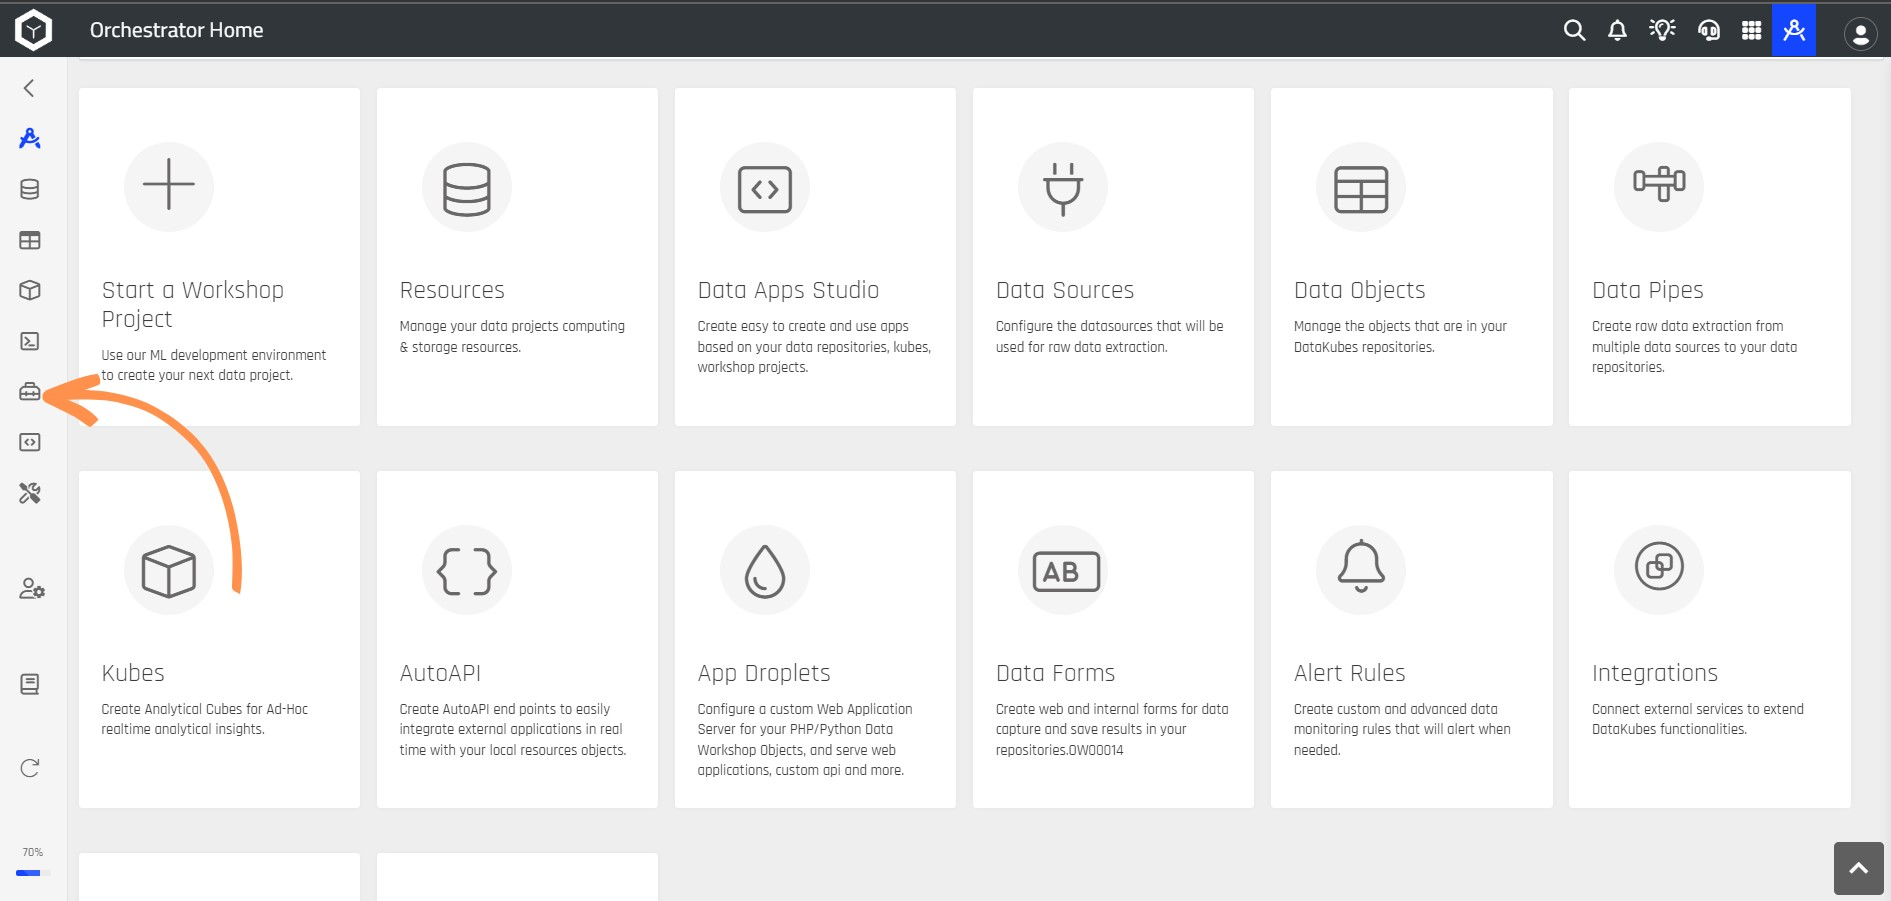
Step 1: From your Home page in the Orchestrator, select Data Workshop.
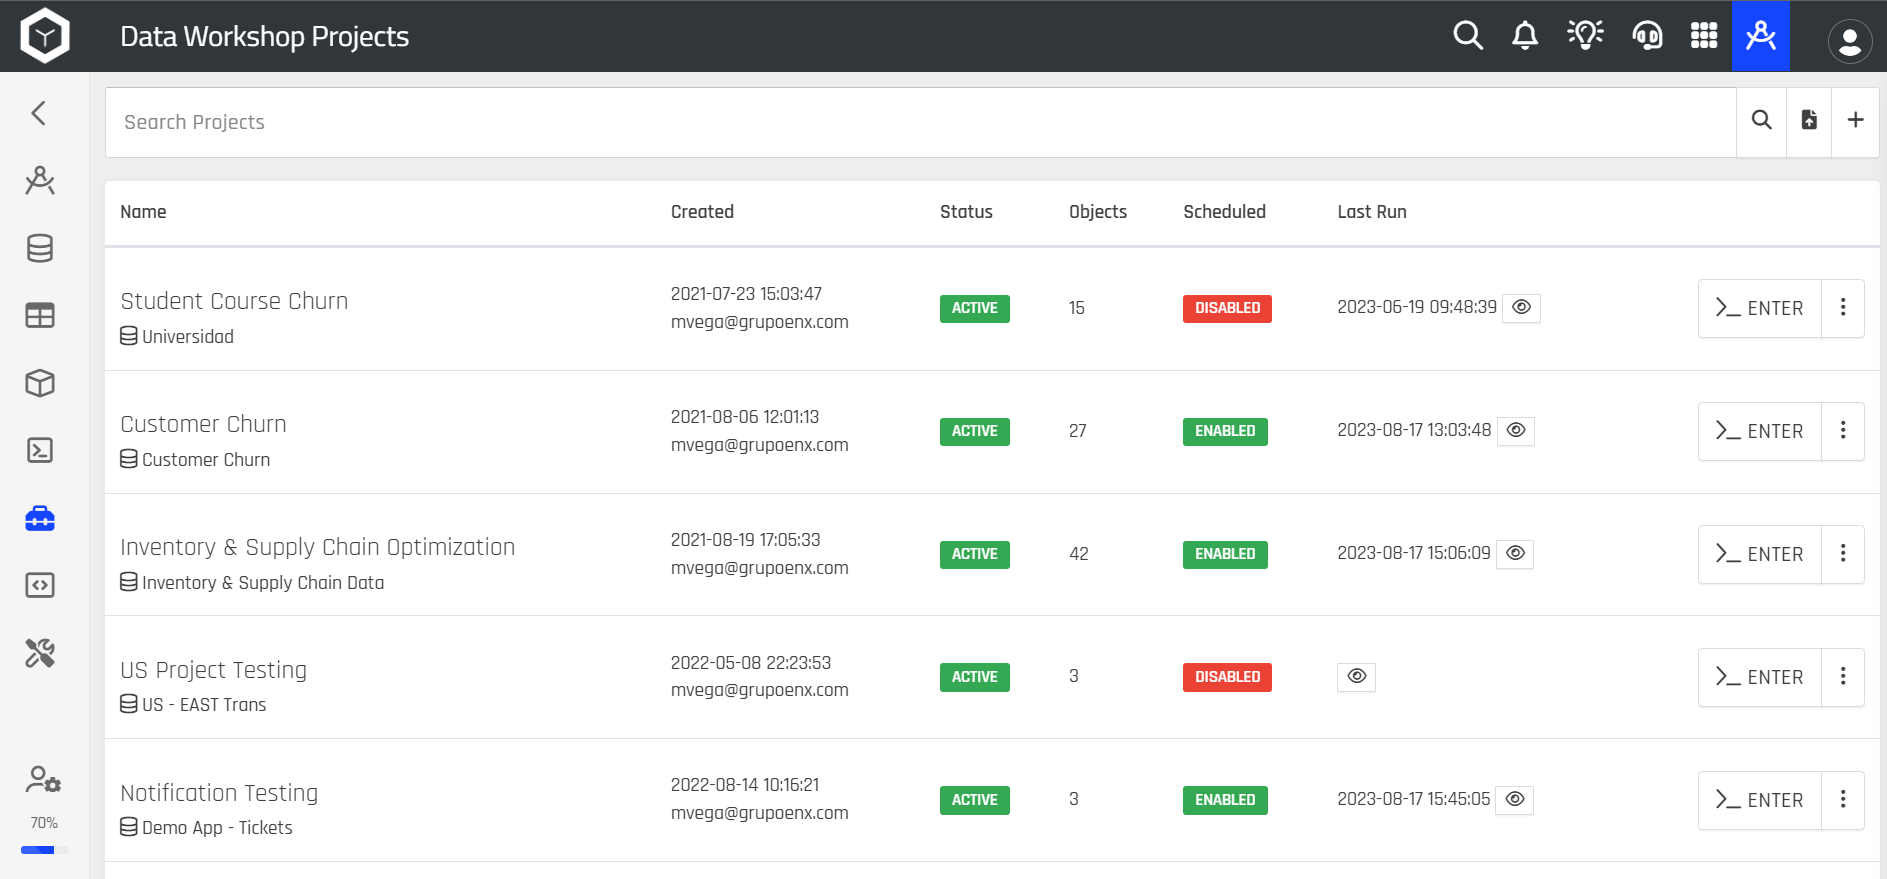
Step 2: Choose the project where you want to create the Machine Learning model.
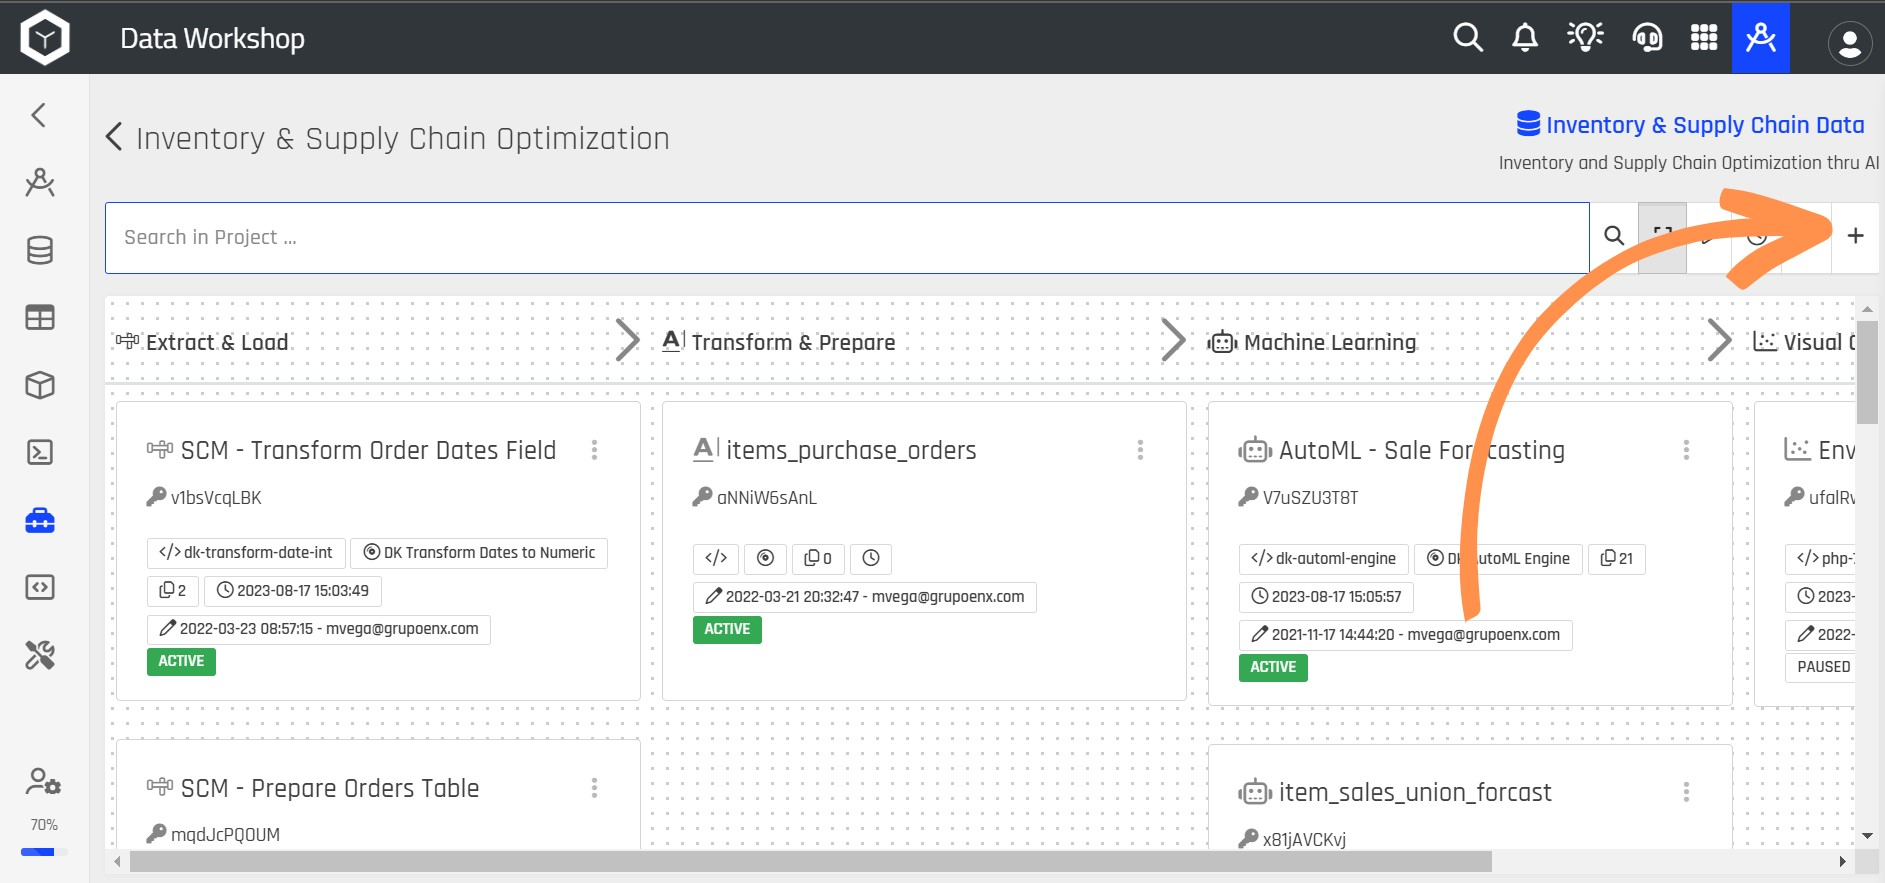
Step 3: Click the + button.
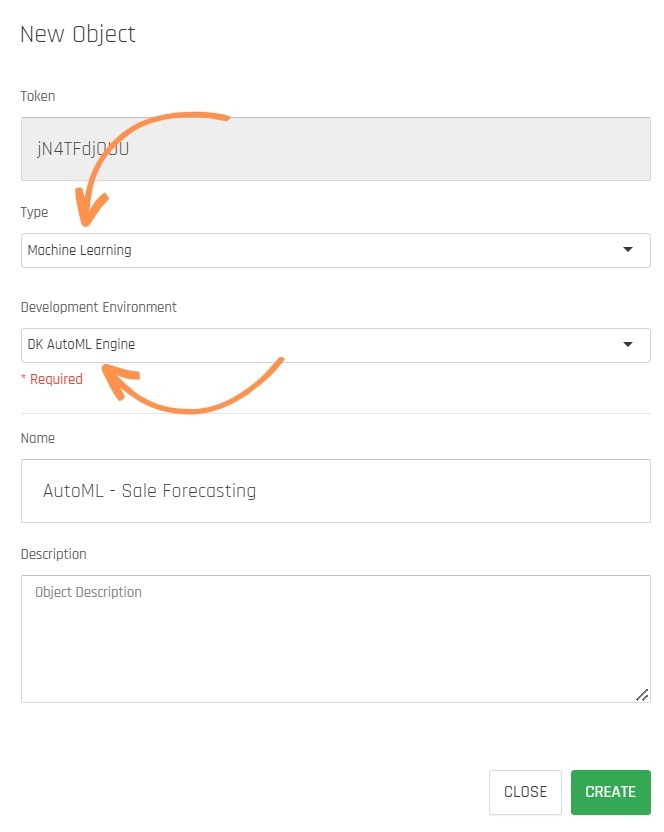
Step 4: A new window will open. Select Machine Learning for the Type, and choose DK AutoML Engine for Development Environment. Then provide a Name for your object and an optional description.
Step 5: Choose the Engine Settings. Select the preconfigured models you want to use, the percentage of data to use for testing the model, whether you want to randomize the dataset, choose Metrics for AutoML Engine Status, and select if you want to retrain on each Batch.

Classification and Regression ModelsDataKubes' AutoML includes classification and regression models. To understand the difference, read the following blog post: Classification or Regression?
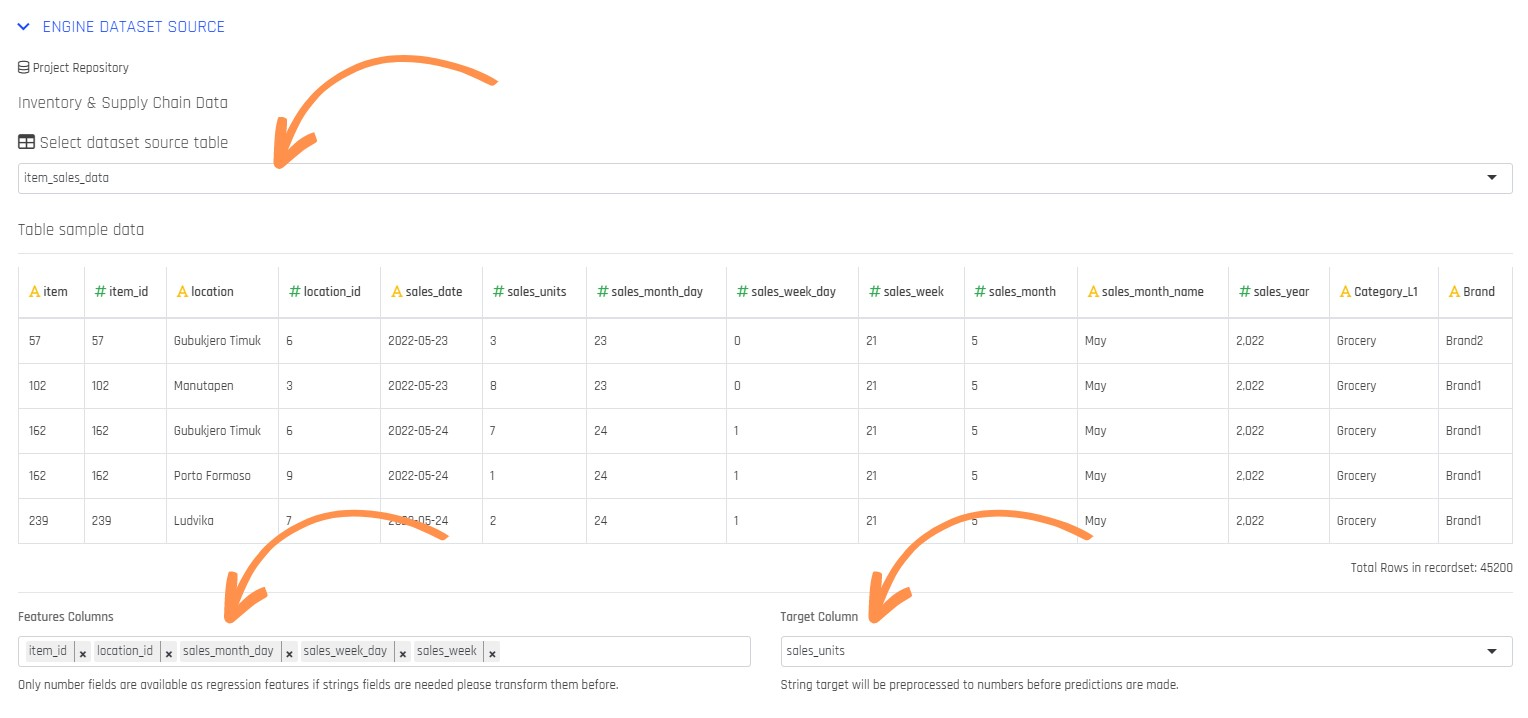
Step 6: In Engine Dataset Source, choose the Table you'll use to train your model. In Features Columns, select the columns for training the model, and choose the column to predict in Target Column.
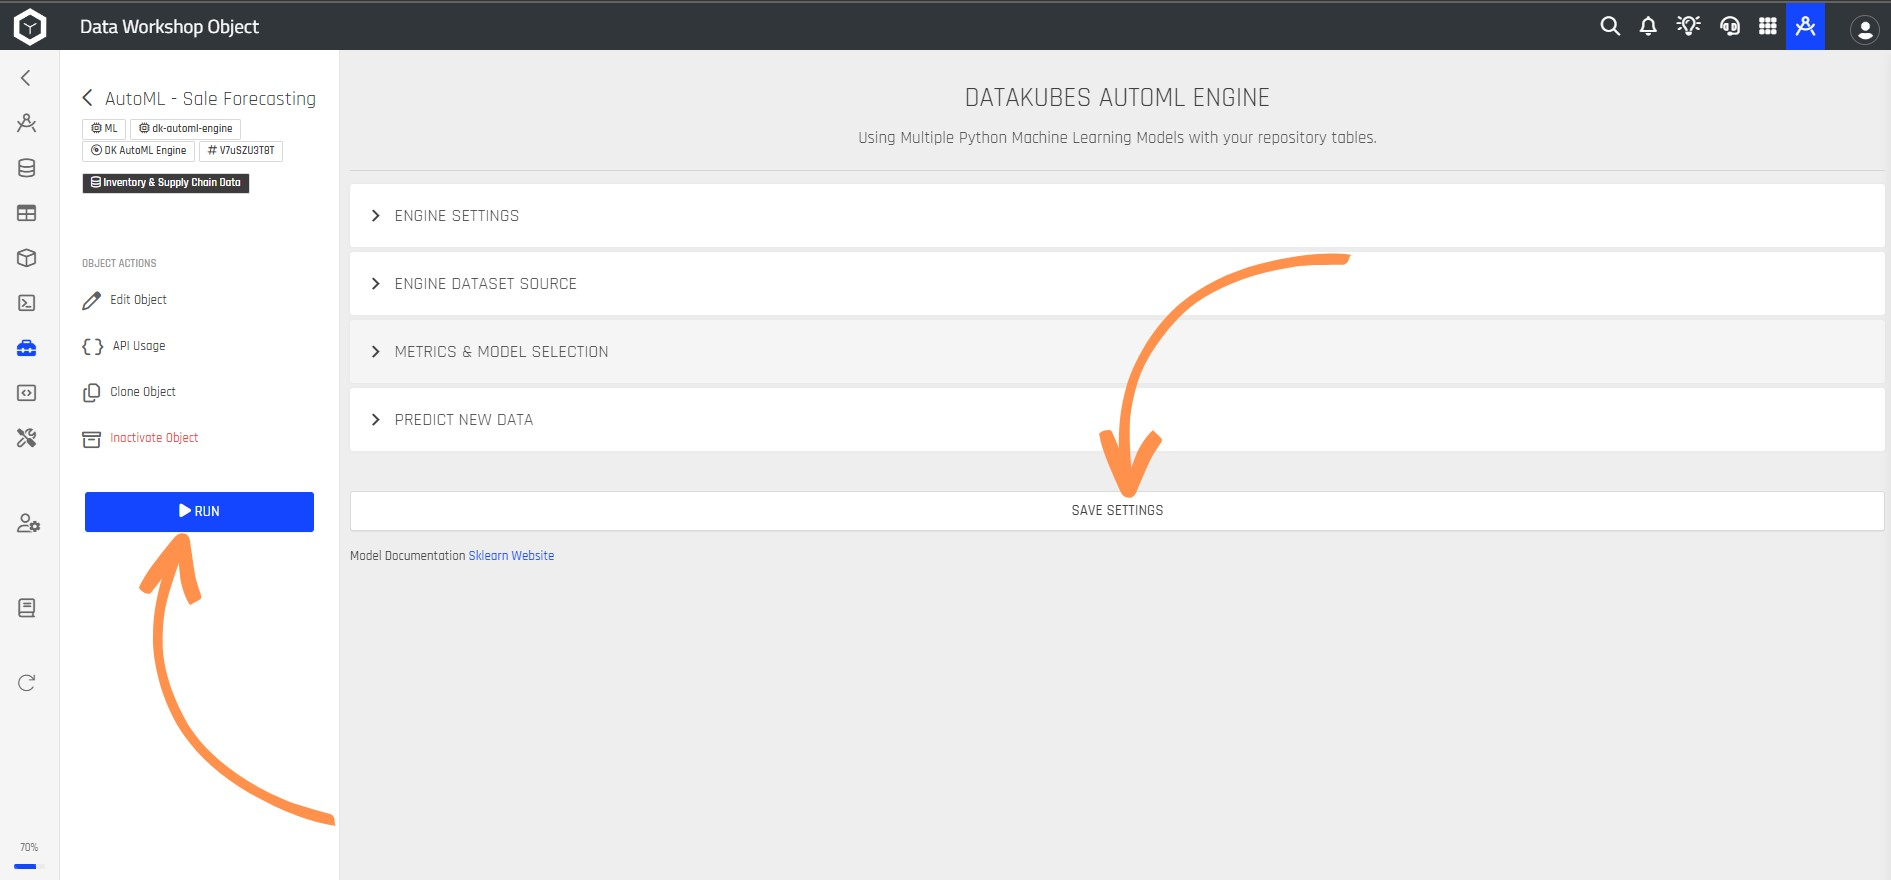
Step 7: Click SAVE SETTINGS, then click RUN.
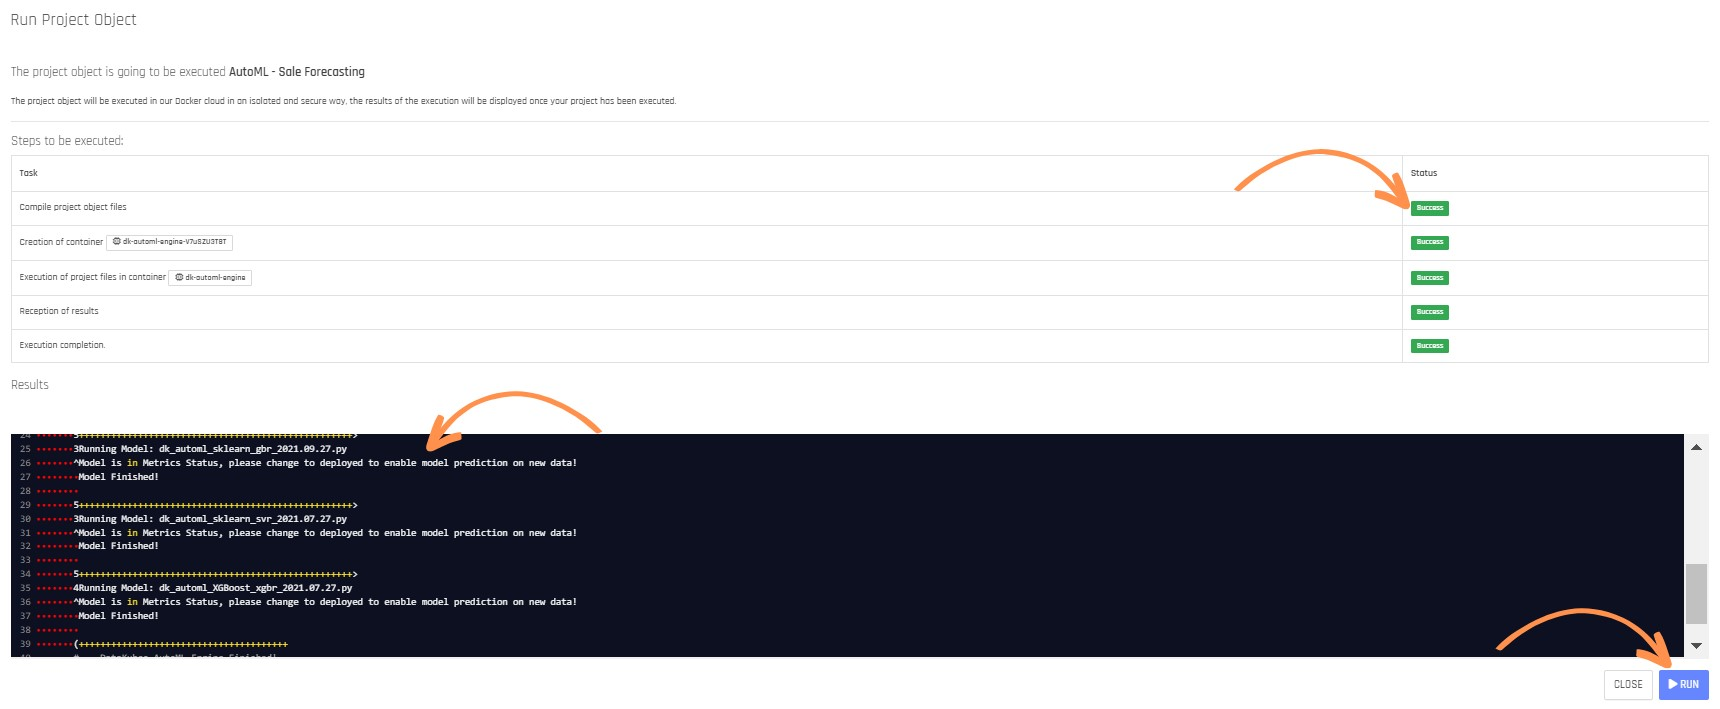
Step 8: After clicking RUN, a new window will open. Click the RUN button again to execute the model. You can see the training status in the Status field and the results in the Results section.
Step 9: After training the models, the Metrics section will open immediately. Here, you can see the evaluation metrics for each model. Click on the model with the best accuracy.
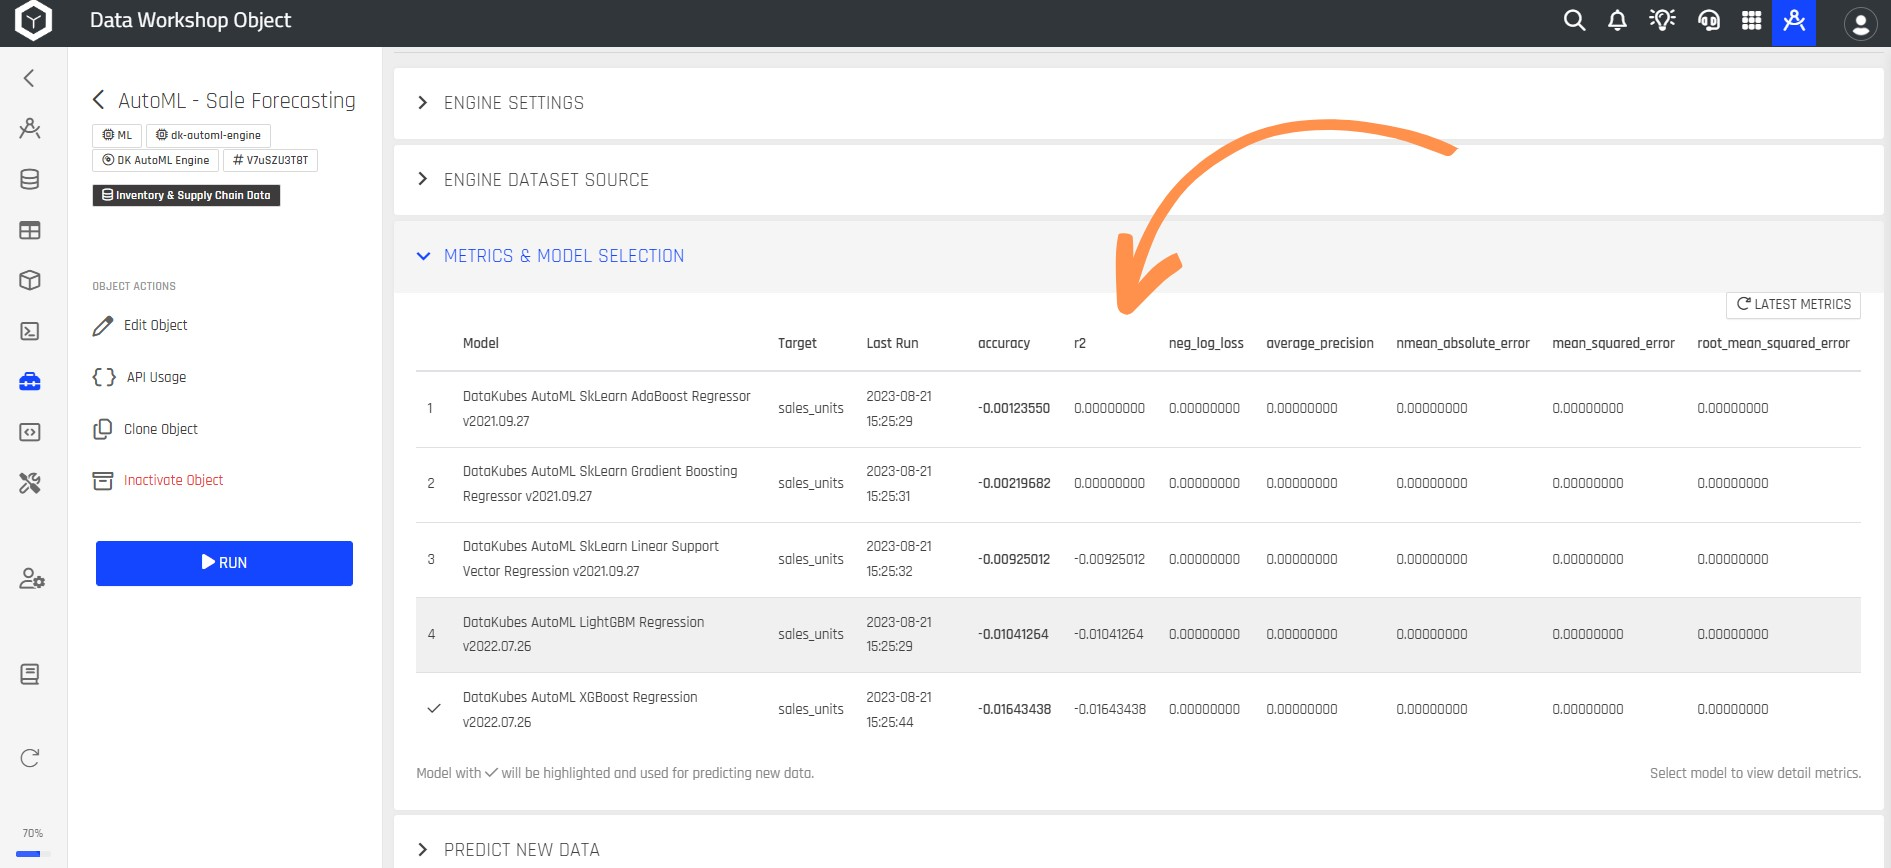
Accuracy MetricThe accuracy metric helps us understand how well the model performed. The closer it is to 1, the better the model.
Step 10: In the ENGINE SETTINGS section, choose Deployed for AutoML Engine Status.
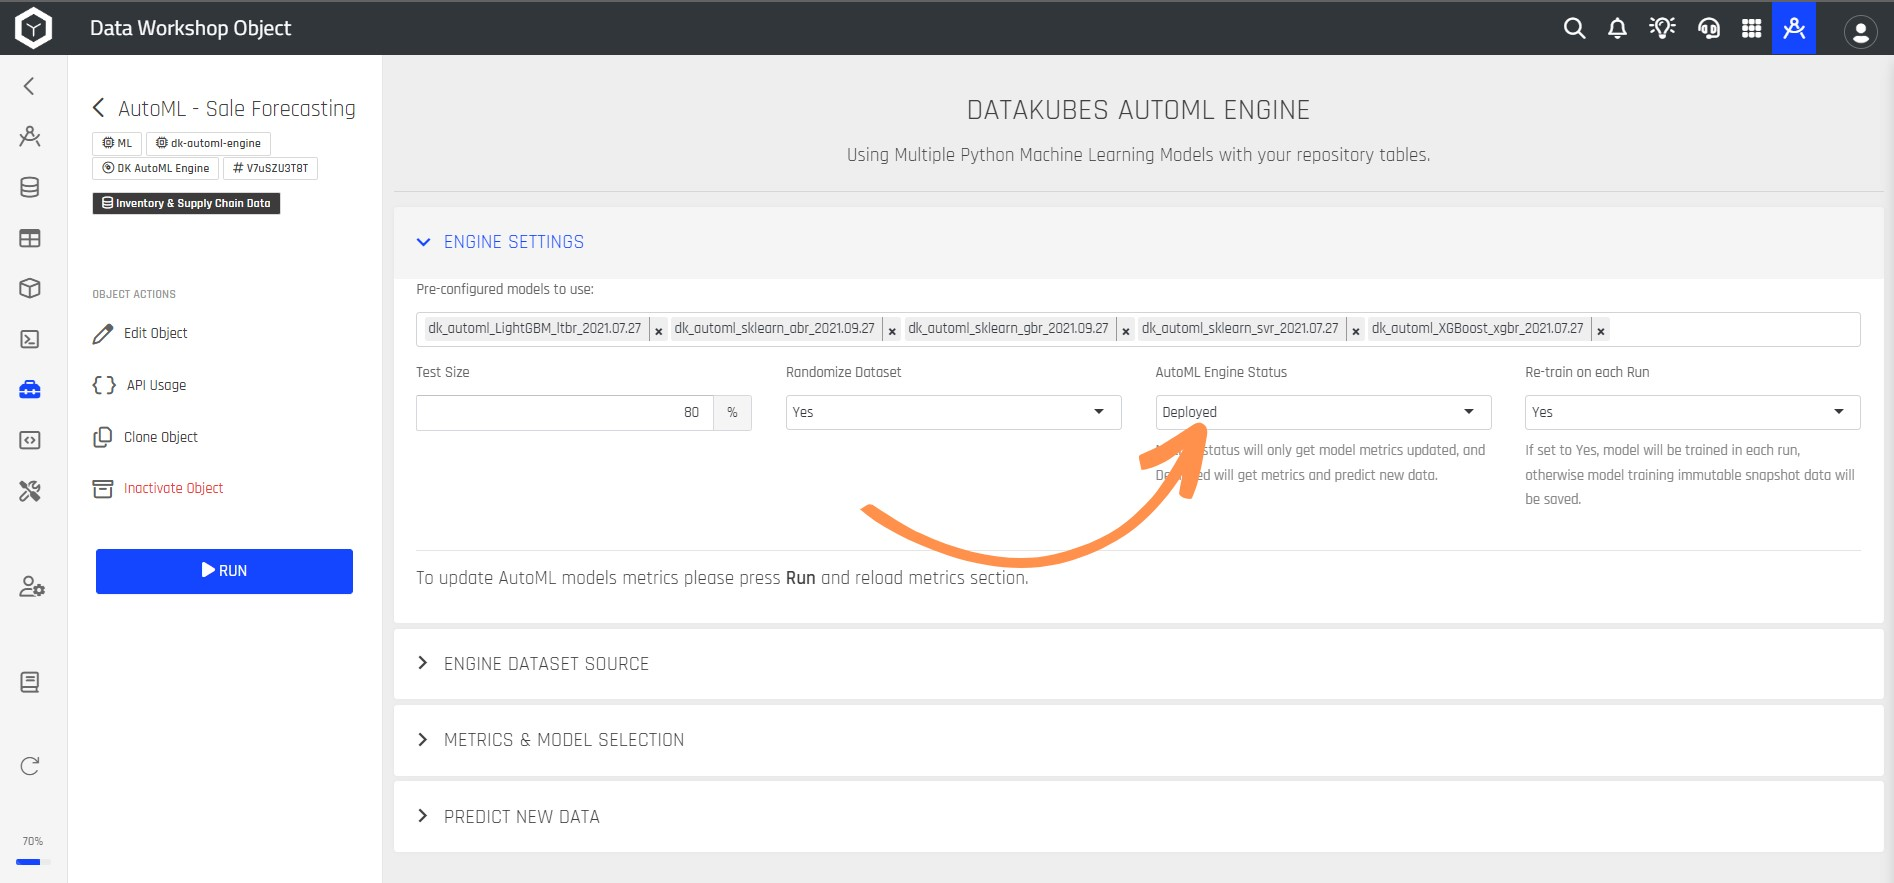
Step 11: Click SAVE SETTINGS, then click RUN.
Step 12: You'll return to the Metrics section where you can observe the behavior of your model, ready for use.
Step 13: In the PREDICT NEW DATA section, choose the table you want to apply the model to. Click SAVE SETTINGS and then execute. The predictions will be stored in the selected table.
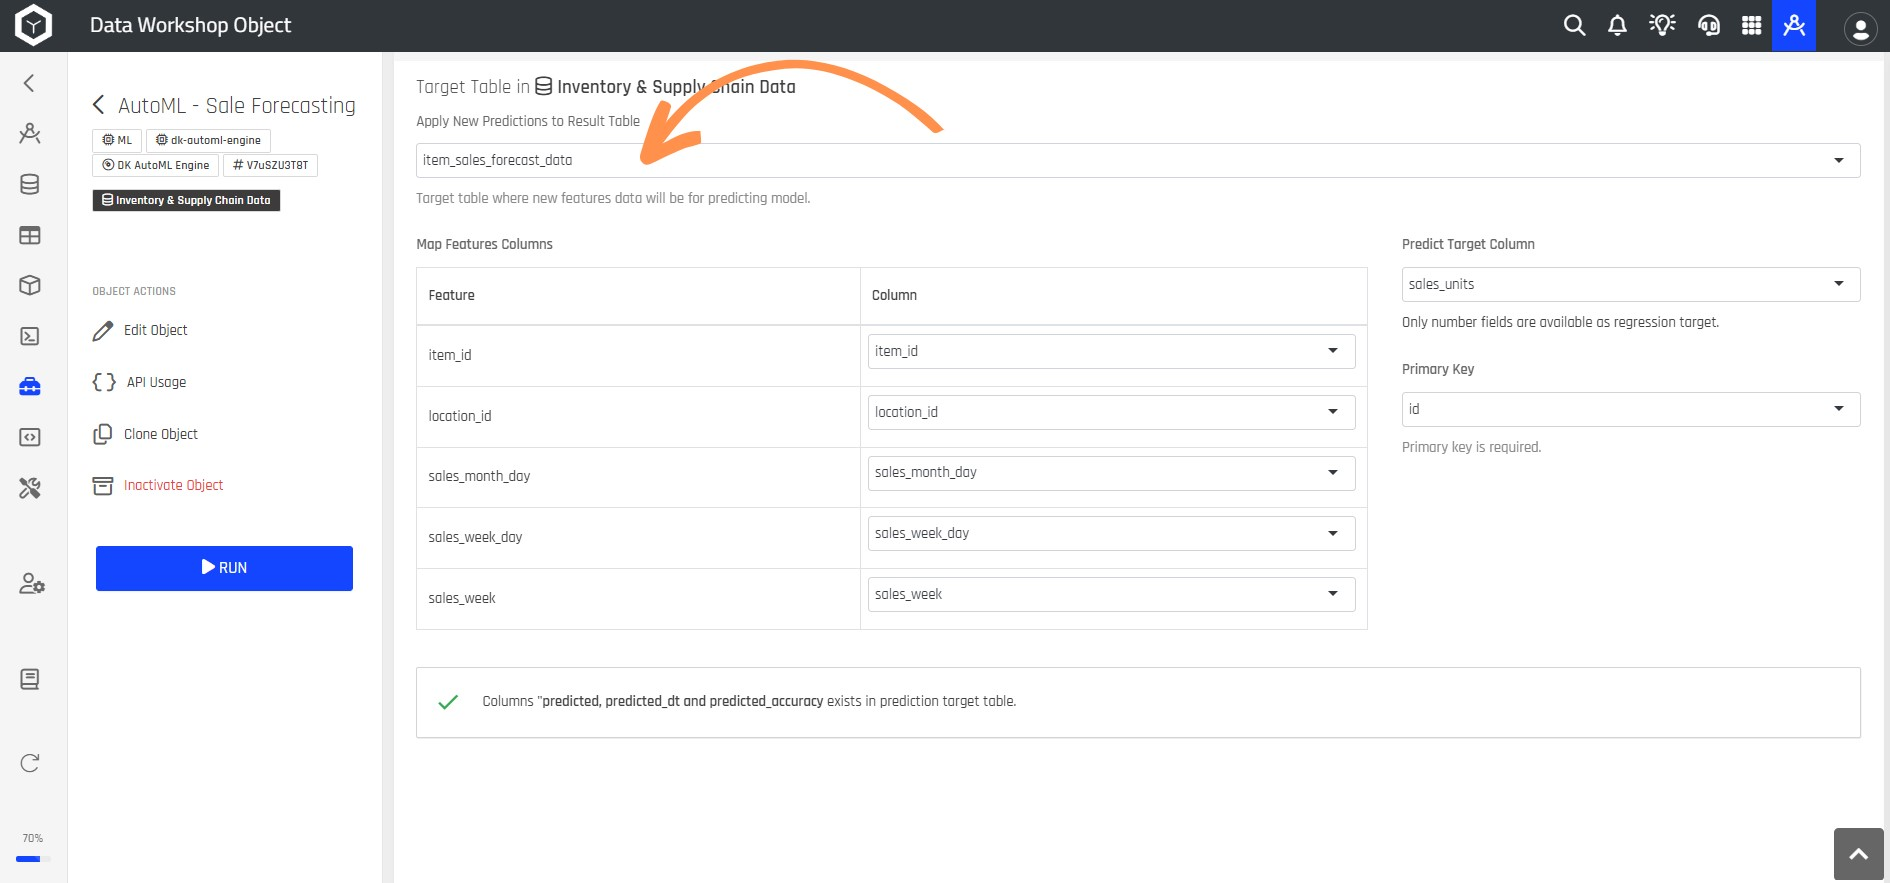
Columns "predicted, predicted_dt" and "predicted_accuracy"You don't need to manually add these columns. If the table doesn't have these columns, DataKubes will create them automatically.
This way, you have created your first AutoML model in DataKubes.
Updated over 1 year ago